
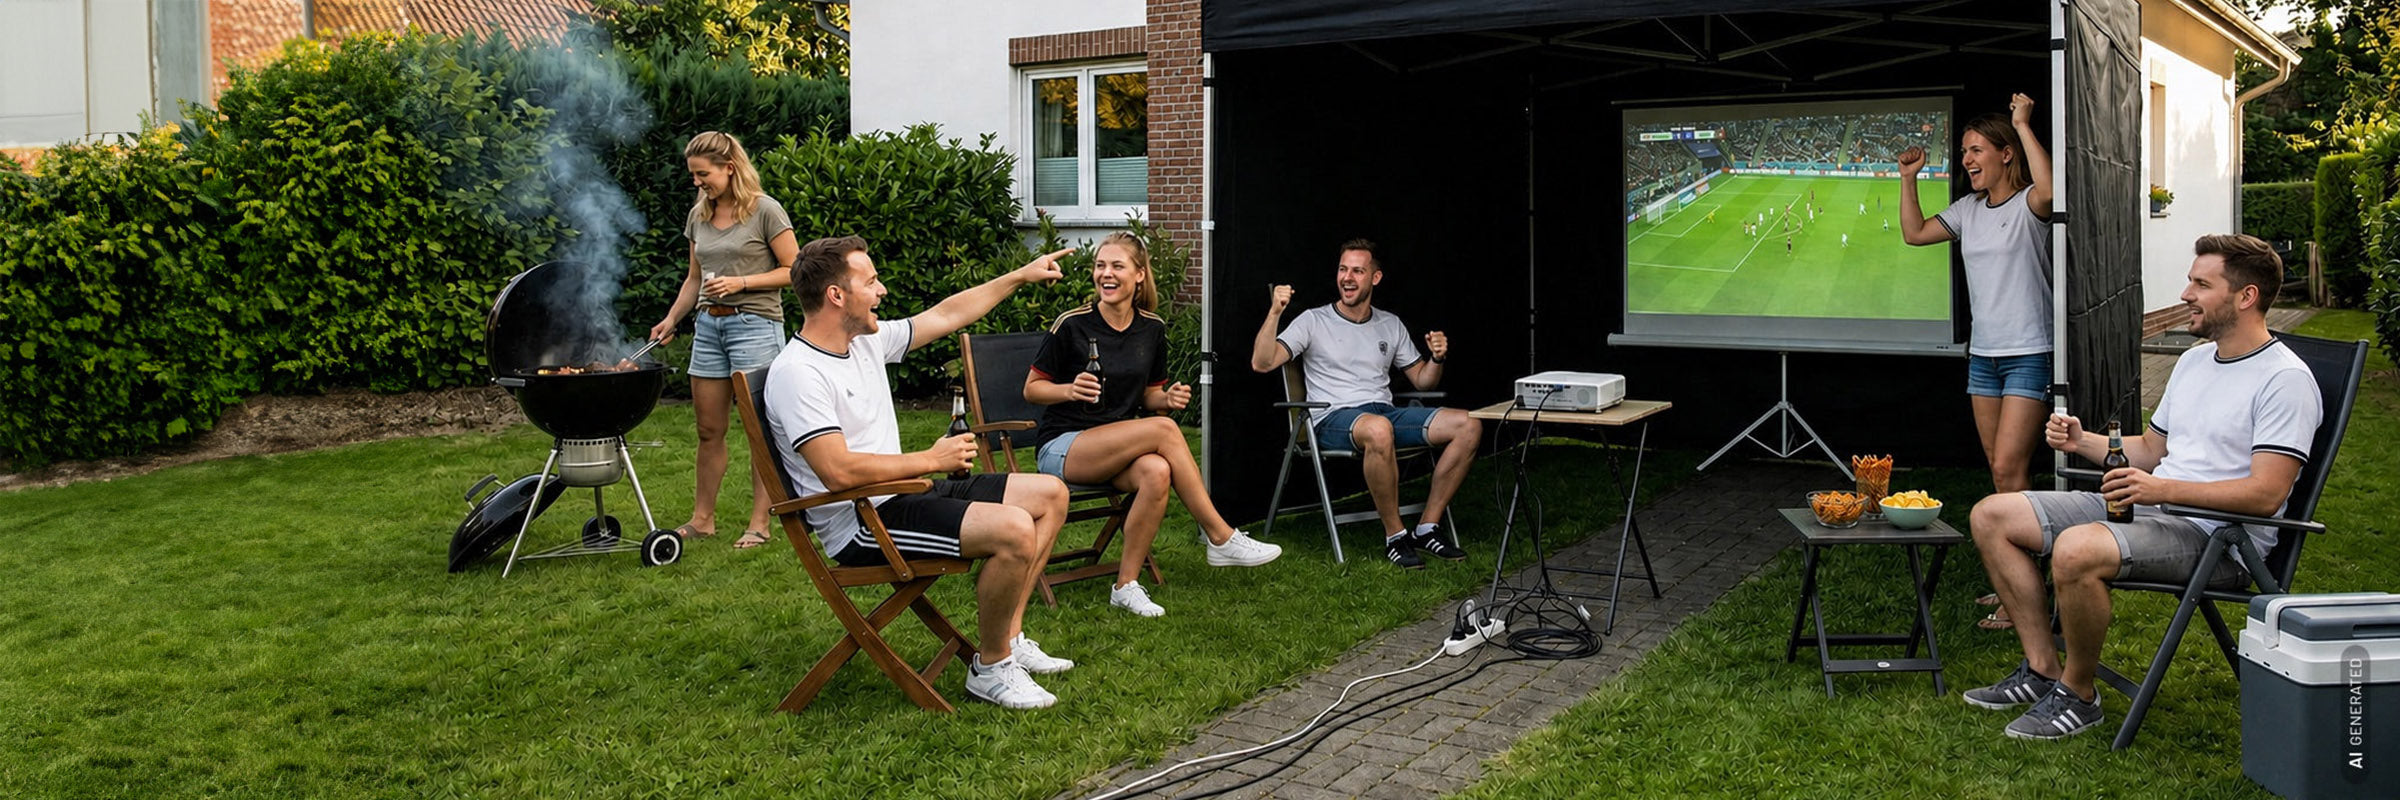
Outdoor projection is the obvious solution wherever you want a big picture but have neither the wall nor the power supply for a giant display – on the patio just as much as on a roadshow, in the club garden or at a pop-up cinema during a town festival. Large-format TV panels do exist up to 100″ and beyond, but they are heavy, bulky and a logistical challenge to set up. A projector achieves the same image size – and more – at a fraction of the weight, sets up in minutes, travels in the boot of your car and adapts to whatever location you are working with. Granted, you also need a screen and a stand – but dismantled, rolled up or deflated, the entire setup remains far lighter and more compact than a large-format display, and above all: it fits through any normal door. The trick is not the most expensive device, but the right positioning, the right brightness for the lighting conditions and a few simple measures that hardly anyone thinks of outdoors – whether in a private garden or at a professional event.
At a glance
- Brightness by image size + lighting conditions: 100–120″ (approx. 250–300 cm) after sunset from 3,000–4,000 ANSI lumens. 150″ from 5,000–6,000 lumens. 200″ or ambient light: 8,000 lumens and up.
- Shade beats lumens: A gazebo, carport or pergola over the screen improves picture quality more than any lumen upgrade.
- Professional events play in a league of their own: Roadshows, pop-up cinemas and public viewing for 100+ people need installation projectors with 8,000–20,000 lumens, interchangeable lenses and weatherproof housings.
- The projector goes back indoors after use: Dew, insects and temperature changes are the biggest outdoor risks – a protective case is the simplest insurance.
- Battery projectors only as a special case: Portable models with 2–4 hours of runtime are no substitute for a stationary setup on mains power.
- Wait for sunset: Before civil twilight (approx. 30–40 minutes after sunset) even the brightest projector stands no chance against the sun.
- How much brightness does each image size need?
- Shade is the most important factor
- Rear projection: projector behind the screen
- Sun, shade and dusk: when is outdoor use worthwhile?
- Screen options for outdoor use
- Power, cables and safety
- Sound outdoors
- Insects, weather and storage
- Professional setup: outdoor events, roadshows and pop-up cinemas
- Mobile option: battery projectors, camping and vanlife
How much brightness does each image size need?
The most honest answer is: it depends on the image size and the lighting conditions – not on the number of people. Projecting at 100″ calls for different values than setting up a 200″ screen for 50 people. The following table covers typical outdoor scenarios – from a private patio setup to a club evening, a professional roadshow or a pop-up event:
| Image size | Lighting conditions | Recommended ANSI lumens |
|---|---|---|
| 100″ (approx. 250 cm) | Completely dark, after dusk | from 2,500–3,000 ANSI lumens |
| 120″ (approx. 300 cm) | Completely dark, after dusk | from 3,000–4,000 ANSI lumens |
| 120″ (approx. 300 cm) | Early dusk, ambient light | from 4,000–5,000 ANSI lumens |
| 150″ (approx. 375 cm) | Dusk or bright ambient light | from 5,000–6,000 ANSI lumens |
| 200″ (approx. 500 cm) and larger | Dusk, larger audience | from 6,000–8,000 ANSI lumens |
| Any size | Real daylight without shade | from 8,000–10,000 ANSI lumens + ALR screen |
Keep two effects in mind: first, the image area grows faster than the diagonal – and with it the lumen requirement. In concrete terms: a 100″ screen in 16:9 format has an area of around 2.8 m² (approx. 221 × 124 cm), whereas a 150″ screen already has around 6.2 m² (approx. 332 × 187 cm). That is over 120 % more area for a diagonal increase of “just” 50 inches – the same amount of light has to spread across more than twice the image area, which is exactly why the lumen requirement in the table roughly doubles from 100″ to 150″. Second, a good high-contrast or ALR screen makes the picture look noticeably sharper, punchier and more colourful with the same projector output, because it actively rejects ambient light and reflects only the projector beam. Outdoors with ambient light or in bright daytime surroundings, the combination of a bright projector and a high-quality contrast fabric really comes into its own – the two components reinforce each other, and the result is in a completely different league from any single measure. You will find an overview of suitable fabrics in the category Daylight & contrast screens – or get personal advice directly from our screen specialists on which fabric suits your projector and location.
When comparing, look for ANSI lumens (or ISO lumens) as a reliable measure. Manufacturer marketing figures such as “peak lumens” or “LED lumens” are not comparable. If you want to go deeper, you will find the background in our guide to projector brightness and in the comparison ANSI lumens vs. ISO lumens.
For a concrete selection of models by audience size, image size and laser or lamp technology, see our category Public viewing projectors – where we have pre-filtered the models suitable for outdoor use.
Shade is the most important factor
The single biggest lever for a brilliant outdoor picture is shading the screen. As long as direct stray light falls on the projection surface, even a bright projector cannot deliver its full picture quality – contrast, black levels and colour saturation visibly suffer. In the shade, on the other hand, a good projector shows its full potential, and under a gazebo, carport or awning the picture looks considerably more brilliant than on an unprotected surface. These sources of shade work particularly well in practice:
Gazebo (mobile or permanent): The classic – a pop-up or event gazebo over the screen puts the picture completely in the shade and also protects the projector and audience from sudden rain. Mobile gazebos (3 × 3 m) can be put up in 10 minutes and are by far the most flexible solution – in a private garden as well as at a town festival or roadshow. Make sure you close the side walls on the west side – otherwise the setting sun will come in low under the roof.
Carport or open garage: A carport already provides a ready-made shading structure: the rear wall lies in its own shadow, power is usually already available, and the roof also protects against unexpected rain. Set up the projector on a table or stand, put the screen in front of it or project straight onto the wall – done.
Awning or pergola: An extended awning over the patio shades the screen and the seating area at the same time. With a free-standing pergola, an additional sun sail or a light shade fabric over the west side is worthwhile.
A recess in the house wall as natural shade: Many buildings have a corner that lies in its own shadow from late afternoon onwards. This recess is a free, perfect projection surface – ideally with a light, smooth wall. Pay attention to the orientation: an east-facing wall is in the shade in the evening, a west-facing one in the sun.
Hedges or trees as a screen for rear projection: If you want to position the projector behind the screen, you can use hedges or dense shrubs as a natural screen for the projector location. The next section on rear projection describes how the setup works in detail and which fabric you need.
Rule of thumb for positioning: Face the screen east – the setting sun in the west then only hits the back and not the image surface. If you want to keep the projector completely out of the seating area and avoid shadows from people walking past, the next section offers a more elegant alternative: rear projection.
Daytime events are feasible – with the right shading: Roadshows, town festival promotions, open-air day conferences or family events in the afternoon do not take place in the evening – they need a reliable picture in the middle of the day. The key is the combination of a bright projector and a fully shaded projection area: an event gazebo with closed west walls, a permanently installed sun sail over the screen and seating area, or a carport or hall canopy as natural weather protection. Even the brightest projectors fail in direct sunlight – in the shade, however, they deliver their full effect. In a setup like this, a vivid daytime picture is realistically achievable, ideally from 6,000 ANSI lumens upwards and, depending on image size, considerably more: at 100–120″ (approx. 250–300 cm) the range around 6,000–8,000 lumens is a solid starting point, and from 150″ (approx. 375 cm) and for larger seating areas you should go well above that. A high-quality high-contrast screen adds further brilliance and colour depth. Without shading, however, the rule is uncompromising: only after sunset.
Rear projection: projector behind the screen

With rear projection, the projector is placed not in front of but behind the screen. The light beam passes from the back through a specially prepared fabric and appears at the front as a complete image. The concept comes from professional event technology and is extremely attractive for outdoor setups in particular, for three reasons: nobody can walk through the picture and cast a shadow, no projector or cable stands in the seating area, and the entire technical setup disappears from the audience’s field of view. For garden events with many guests, pop-up cinemas at town festivals or roadshows with passing foot traffic, this is often the decisive step up in convenience.
What you need:
- A rear projection fabric (rear projection screen): A normal front projection screen does not work for this – its back reflects the light instead of letting it through. Rear projection fabrics are specifically designed to let the projector beam pass through and diffuse it evenly towards the front. Our range includes them as folding-frame versions, as tensioned fabric for mobile frames or as a professional solution for permanent installations.
- Space behind the screen: Depending on the projector and image size, you need 1 to 3 metres of depth behind the screen for the projector and its stand. With a short-throw projector the space required is reduced considerably.
- Mirror function on the projector: Because the image is projected from behind, it appears mirror-inverted at the front. Practically every modern projector has an option in its menu called “rear projection” or “Rear” that flips the image horizontally – one tick is all it takes.
- Screening the projector location: A hedge, a gazebo, a construction fence covered with fabric or a second, smaller screen hides the projector and at the same time protects it from wind, knocks or splashing water.
When rear projection is particularly worthwhile: With more than 15–20 people, in setups with passing foot traffic (pop-up cinema, open-air bar, garden wedding), at longer events with movement in the seating area, or whenever the impression of a “tidy” setup counts – for example at roadshows with a brand presence. When it is less suitable: For a spontaneous film night with family or a small group of friends, the extra effort is rarely worthwhile – the classic front projection setup is perfectly adequate there, and the risk of shadows is manageable.
A note on brightness: by design, rear projection fabrics absorb some of the light on its way through the fabric. So plan generously for the lumen requirement – a projector from the same class you would choose for front projection at the same image size is a good starting point; a little extra headroom never hurts. Our advice service is the quickest way to find out which fabric and which projector suit your specific setup – with rear projection, the result depends heavily on the choice of fabric, projector position and viewing angle.
Sun, shade and dusk: when is outdoor use worthwhile?
Outdoor projection is divided into two fundamentally different worlds – and the dividing line runs not between B2C and B2B but between day and night. No light source stands a real chance against direct sunlight: the sun shines with an intensity that simply outshines any projection on an unprotected surface. If you want to project during the day, there is therefore no way around consistently shading the screen (see the previous section on shade strategy) – in the shade under a gazebo, carport or awning, daytime events are perfectly possible with sufficiently bright projectors.
Without shade, outdoor projection only becomes really usable at sunset – and only really good during civil twilight, the window up to around 30 to 40 minutes after sunset. In Germany this starting window shifts considerably over the course of the year:
- May/June: Sunset around 21:00–21:45, usable picture from approx. 21:30–22:15
- July/August: Sunset around 20:30–21:30, usable picture from approx. 21:00–22:00
- September: Sunset around 19:30–20:30, usable picture from approx. 20:00–21:00
The exact times vary regionally by 15–30 minutes – in western Germany the sun sets later than in the east. A quick look at your weather app is enough for planning. If you need to start earlier – for example because a daytime event begins at 14:00 or a children’s programme runs in the afternoon – choose a more powerful projector and deliberately plan in shading rather than waiting for sunset.
Special case: sports public viewing: If you are planning a larger football or sports event in the garden or at the clubhouse, you will find sunset tables for German cities, tips on the signal source and an overview of noise regulations for public viewing in our public viewing guide.
Screen options for outdoor use
A proper screen is almost always the better choice outdoors than an improvised solution – it delivers a flat image, can be secured against the wind and reflects the projector light more efficiently than any house wall. Three types of portable screen have proven themselves for outdoor use:
- Pull-up screen (pulled up out of a floor case): compact, set up in seconds, ideal for spontaneous setups. However, it is sensitive to wind because the image surface stands free.
- Inflatable outdoor screen: ready to go in a few minutes, very large image possible (140″ / approx. 310 cm image width), secured against wind with ground anchors. A classic for garden events, town festivals and pop-up promotions.
- Folding-frame screen: sturdy aluminium frame with tensioned fabric, very flat image, easy to secure against wind – the premium option for regular setups and professional event technology.
For even better picture quality in ambient light, a daylight screen with high-contrast fabric helps; a detailed comparison of screen types including recommendations can be found in our category Public viewing projectors.
House wall or bedsheet – only if there really is no screen to hand: If you ever find yourself completely unprepared, in an emergency you can fall back on a smooth, light-coloured house wall or fix a tightly stretched bedsheet between two fixed points. Both deliver a usable picture – but it remains a compromise, and the result clearly shows it: house walls have texture, plaster grain, discolouration and usually a slight colour cast that visibly dulls the contrast. Bedsheets crease, move with every gust of wind and reflect the projector light noticeably less well than a professional fabric. Both options are an emergency fix for exactly one evening, not a setup you will be happy with in the long run. The single biggest leap in picture quality in an outdoor setup comes not from a better projector but from a proper portable screen – it is the purchase that pays for itself almost immediately compared with any improvisation.
Power, cables and safety
Projectors need a reliable power supply – and outdoors that cannot always be taken for granted. A few points you should clarify before setting up for the first time:
- Outdoor socket with RCD protection: If there is no permanent outdoor socket, the cable runs from the building via a cable reel. Important: always unwind the cable reel completely – reels left wound up can overheat under load.
- Splash-proof power strip: An outdoor-rated power strip (IP44 or better) is safer than the household version.
- Mark trip hazards: Cables in the half-dark are the main reason projectors get knocked over. Cable protectors from the DIY store or marking with reflective tape help.
- Never put the projector directly on the lawn or the ground: Moisture, insects and a fan that sucks in grass or dust are a bad combination. A stable table, stool or a sturdy projector stand is a must.
- Switch off sprinklers or irrigation: A lawn sprinkler that starts automatically at 23:00 is a guaranteed end to any outdoor setup. If you have programmed irrigation, remember to press pause before you start.
- Avoid cable runs through the audience altogether: If you want to get rid of all cable issues, trip hazards and the projector in the seating area for good, place the projector behind the screen – see the section on rear projection.
Sound outdoors
A great picture without sound feels like half an evening. Three options have proven themselves outdoors:
- Active speakers or soundbar with Bluetooth: The simplest solution. A Bluetooth soundbar or an active stereo set such as the celexon active speaker set 2-way 5.25″ delivers enough volume for 10–30 people and can be set up in a few minutes. With wireless setups, make sure you have a stable Bluetooth connection: outdoors the range is often shorter than stated because there are no walls and obstacles to reflect the signal.
- Wired connection via jack: If the Bluetooth connection causes latency (lips out of sync with the sound), a simple jack cable from the projector to the speaker is the most reliable solution.
- FM transmitter or wireless headphones for late hours: If you are still watching a film at 11 pm, you don’t want to wake the neighbours. An FM transmitter sends the sound to several small radios or headphones – a setup that has proven itself at drive-in cinemas.
Good outdoor sound does not need a home cinema subwoofer. Clear mids and intelligible speech are more important than bass – outdoors, deep bass dissipates quickly anyway because there are no walls to reflect it.
Tip for good neighbourly relations: A quick heads-up the day before or in the morning (“open-air event tonight, quieter from 11 pm”) works wonders. Most neighbours find the idea charming – if you ask them beforehand.
Insects, weather and storage: what many people underestimate
Projectors are designed for indoor use – as technical precision instruments with fans, optics and sensitive electronics. Outdoors they can play to their full strengths as long as you follow a few simple rules that protect the device from typical outdoor risks:
Insects and projector heat: A projector’s fan draws in air – and in summer, mosquitoes, moths and pollen with it. The waste heat attracts insects too. Place the projector a little away from the seating area so that the insects it attracts fly past the audience. A light insect net over the ventilation openings is not recommended – it blocks the cooling.
Dew and condensation: As soon as the sun is gone, the temperature drops. Condensation forms on cold projector surfaces. The rule of thumb: bring the projector back indoors after use, do not leave it outside overnight. If the projector has been outside for a long time, let it acclimatise in a warm room for 30 minutes before switching it on again.
Quick-release ceiling mount for regular outdoor use: If you use the projector several times a season in the garden, under the carport or on the covered patio, you will soon reach the point where constantly setting up and dismantling a stand or table tests your patience. An elegant solution is a ceiling mount with a quick-release plate – for example the celexon Universal MultiCel 1500 Expert ceiling mount, which is available in various lengths. The mount is fixed once under the carport roof, pergola, gazebo apex or patio canopy; the projector itself clicks into the quick-release plate in seconds during setup and can be removed just as quickly after use. This makes the “back indoors after use” rule easy to follow without testing your patience – no stand to set up, no wobbly table solution, and next time the projector sits at exactly the same angle again.
Transport and storage: A padded transport case is the best insurance against impact damage when carrying the projector back and forth. For longer storage in a garage, warehouse or service vehicle, small silica gel sachets in the case help – they absorb residual moisture and protect the optics from mould.
Permanent outdoor installation: If you want to operate a projector outdoors permanently (for example a fixed garden cinema solution or permanently installed outdoor advertising), you need a climate-controlled protective housing. Such housings keep out dust, moisture and temperature fluctuations and are standard in the professional sector. For most private customers that is overkill – the mobile option is cheaper, more flexible and easier on the device.
Professional setup: outdoor events, roadshows and pop-up cinemas
If you use projectors professionally outdoors – on roadshows, summer parties, town festival promotions, open-air conferences, public viewing stages or pop-up cinemas – you are playing in a different league from the private garden setup. Image sizes here typically range between 200″ and 500″ (approx. 5–12 m), the audience is larger, the setup sequence has to be spot on, and the projector often runs for several hours at a time, in changing light conditions and with a significantly higher risk of failure. This class calls for installation projectors with 8,000–20,000 ANSI lumens, interchangeable lenses for variable setup distances, a laser light source for instant readiness and continuous operation, lens shift for flexible positioning without keystone distortion, and professional interfaces such as HDBaseT for cable runs of up to 100 m. For outdoor use, climate-controlled protective housings are standard – they protect the device from dust, moisture and sudden changes in the weather and are mandatory for most rental companies and event technicians. You will find a pre-filtered selection of suitable models in our category Installation projectors; for concrete project planning – image size, position, power supply, edge blending with multiple projectors, weather protection – our sales team will advise you personally. For larger events, a call before you buy is almost always worthwhile, because brightness, lens and protective housing can only be sensibly dimensioned in combination.
Small professional setups amid passing foot traffic: customer promotion, sales stand, pop-up campaign. Not every professional outdoor setup is a major event. Retailers, restaurateurs, tourism providers, car dealerships or event agencies regularly use projectors for small, permanent or half-day promotions in the middle of day-to-day business: a promotional gazebo in a pedestrian precinct, a sales stand in front of the shop, a loop of specials in a restaurant’s outdoor area, a sponsor loop at a market stall or a product tutorial outside the branch. Image sizes here are typically 80–120″ (approx. 200–300 cm), the audience consists of passers-by with a few seconds of attention, and the whole setup logic revolves around setting up once and then letting it run unattended for several hours. The ideal hardware combination: a bright projector from the daylight class with 4,000–6,000 ANSI lumens, an event gazebo with completely closed west walls (so that the projection area is in the shade even around midday – see the section on shade strategy), a sturdy stand or a quick-release ceiling mount on the gazebo’s inner frame, and as the signal source a USB stick with looped content or a small streaming stick with a prepared playlist – no live signal, no noticeable latency. Sound usually plays only a minor role, because traffic and pedestrian noise drowns out the audio anyway; often the projector’s built-in speaker or a small Bluetooth speaker is enough. You will find a suitable selection of models in our categories Daylight projectors and Public viewing projectors; we will be happy to tell you which image size and model suits your specific location – especially with daylight conditions changing over several hours: a short message with your location and operating times is all we need.
Compact alternative for mobile setups: laser TV and UST projectors with a floor-rising scissor screen. Where a classic installation projector needs several metres of throw distance and a table or stand in the middle of the audience, ultra short throw projectors (UST) and laser TV models show a strength of their own: they stand directly in front of the screen and, from just a few centimetres away, project an image of typically 100″ to 130″ (approx. 250–330 cm) – this is the size range in which CLR fabrics are available as standard, both as a motorised floor-rising scissor screen and as a permanently installed fixed-frame screen with CLR fabric. (Larger CLR image sizes are currently not common on the market; motorised CLR screens for ceiling or wall mounting cover a slightly smaller range up to 120″.) The entire setup is put up without any stands to trip over and without a projection area in the audience. The ideal companion screen for this use is a motorised floor-rising scissor screen with integrated CLR fabric – an elegant design in which the fabric rises from a flat floor housing at the push of a button and disappears completely back into it after use. The celexon UST high-contrast floor-rising scissor screen HomeCinema Plus 100″ weighs around 24 kg, can be loaded lying flat in its transport housing into a longer estate car or Sprinter, and is ready for use at full image size in seconds on site – no assembly, no tensioning of fabric, no waiting.
For roadshows, showroom tours, mobile brand presentations or compact pop-up campaigns, this combination is a huge advantage: no shadows cast by the audience, no long cable runs, no setup risk with a free-standing stand – the entire setup is ready in a few minutes. The CLR fabric (ceiling light rejecting) of the floor-rising scissor screen is specifically designed for the steep angle of light from the UST projector below and deliberately rejects stray light from above; a normal white screen would lose a massive amount of contrast here. For daytime B2B events with image sizes up to around 130″ – car presentations at the showroom, outdoor product launches, brand activations at trade fair grounds, intimate sponsor lounges – the combination of laser TV/UST plus a floor-rising scissor or fixed-frame CLR screen is the fastest, most compact and visually tidiest solution. As soon as the picture has to be much larger or an audience of more than a hundred people needs to be reached, the installation projectors with large-format optics described in the first paragraph come into play. The two setup classes complement rather than replace each other – the right choice simply depends on the target image size and the available position.
Mobile option: battery projectors, camping and vanlife
Battery projectors are the right choice when power cannot be taken for granted – when camping, at the lake, on an allotment without a supply, for a spontaneous pop-up in the park or as an on-board cinema at a pitch in a caravan, motorhome or converted van. They have a built-in battery with typically 2 to 4 hours of runtime, are compact (often smaller than a shoebox) and ready to use in seconds. The price for this: they usually deliver considerably less brightness than mains-powered projectors – often between 200 and 1,000 lumens.
For a really dark camping setup with a smaller image (60–80″, approx. 150–200 cm), that is enough. But as soon as ambient light comes into play or the image needs to be larger, battery projectors quickly reach their limits.
Alternative for more brightness without a socket: A normal home cinema or business projector combined with a portable power station. A 500 Wh battery is enough for around 2.5 hours of projector operation – giving you a full-quality picture even without a fixed power connection.
Vanlife, caravans and campers: outdoor cinema at your pitch. For campers, vanlife fans and caravan owners, a projector is one of the most space-saving ways to create a real cinema experience in the evening at your pitch or by the lake – a 100″ image (approx. 250 cm) on a bedsheet between the vehicle and the awning takes up exactly zero storage space in the camper, unlike any TV you might carry along. The power question can be solved in two ways: if you have a converted on-board electrical system with a 230 V inverter, simply plug the projector into the socket inside and run an extension cable outdoors – most modern motorhome and van setups offer 1,000–2,000 W of inverter power, which is more than enough for any home cinema projector. The more elegant option is a separate power station (500–1,000 Wh) that runs independently of the on-board system, recharges during the day via solar panel or while driving, and doesn’t drain the leisure battery you need for the night. A practical bonus: if it rains, you can simply bring the same projector inside the camper and project onto the lightest wall – the image size adapts automatically to the distance, and in two minutes your outdoor setup becomes a fully fledged camper home cinema. You will find an overview of suitable models in the category Portable projectors; we can quickly tell you which projector suits your specific on-board system and travel setup – just let us know your on-board voltage and space budget.
A general overview of current battery and mini models can also be found in the category Portable projectors; for brighter models suitable for use with a power station, take a look at the home cinema projector category.
Which projector is best for outdoor use?
There is no single perfect outdoor projector – the choice depends above all on the image size. For a 100–120″ image (approx. 250–300 cm) in complete darkness, 3,000–4,000 ANSI lumens are enough. If you want to project at 150″ or start as dusk is falling, go for 5,000–6,000 lumens. From 200″ or in real daylight, 8,000 lumens and more are needed. Laser projectors are the more sustainable choice: they reach full brightness instantly, need no lamp changes and last 20,000–30,000 hours. You will find a pre-filtered selection in our category Public viewing projectors; for a personal recommendation, our projector advice service will be happy to help.
Is a normal home cinema projector enough for the garden?
Yes – as long as you project after sunset and the image stays limited to 100–120″ (approx. 250–300 cm). A good home cinema projector with 2,500–3,500 ANSI lumens delivers a vivid picture in this situation. As soon as the image is to grow to 150″ or more, or you start while dusk is falling, it is worth choosing a brighter model from 5,000 lumens or adopting a consistent shade strategy.
Do I need a special outdoor screen?
A screen is always better than an improvised solution, but you do not need an “outdoor model” in the strict sense. Classic portable screens (pull-up, inflatable, folding frame) work perfectly well outdoors – the only important thing is that they are set up securely against the wind and packed away dry after use. On a house wall, a gazebo or pergola frame, a carport crossbeam or another fixed outdoor structure, you can also conveniently hang a manual pull-down screen such as the celexon manual pull-down screen Professional Plus 200 × 113 cm with two hooks – a flexible middle ground between fixed wall mounting and a fully portable tripod solution. After the screening, simply unhook the screen, roll it up and take it indoors. With a lot of ambient light or outdoor lighting, a daylight screen with high-contrast fabric improves the picture considerably.
Can I leave the projector outside after use?
No – that is the most important rule for outdoor use. Dew, temperature changes and insects take their toll on the device. Even in stable weather, you should bring the projector and screen indoors after the evening. A padded transport case protects it when carrying it back and forth and is a small investment with a big effect. If you use the projector regularly in the garden, under the carport or on the covered patio, a ceiling mount with a quick-release plate – such as the celexon Universal MultiCel 1500 Expert – reduces setting up and dismantling to a few seconds: mount the bracket permanently under the canopy once, click the projector in when setting up, then remove it after the film night and take it indoors.
Does outdoor projection work without power – when camping or in the park?
Yes, with limitations. Battery projectors with 2–4 hours of runtime are available in compact sizes – however, they deliver considerably less brightness (typically 200–1,000 lumens) and only make sense in really dark surroundings with a small image. For more brightness without a socket, the combination of a normal projector plus a portable power station is the better solution: a 500 Wh power station is enough for around 2.5 hours of feature-film playback.
Personal advice & suitable models
Outdoor projection is a surprisingly relaxed project once the key variables have been properly thought through: image size, lighting conditions, number of people, power supply, wind and shade. If these points are clarified in advance, setting up on the day of the event almost takes care of itself – and the result reliably impresses. We will be happy to work out with you which projector and screen suit your specific location – just get in touch. Our projector specialists will advise you personally – by phone, by email or via chat. We narrow down the range to suit your scenario and tell you honestly which model is worthwhile for your application – whether a private garden, a club evening or a roadshow.
Go straight to the selection:
- Public viewing projectors – pre-filtered for gardens, clubhouses and hospitality
- Daylight projectors – from 5,000 ANSI lumens for bright conditions
- Installation projectors – 8,000+ lumens, interchangeable lenses, HDBaseT for roadshows and outdoor events
- Portable projectors – battery models for camping and spontaneous use
- Daylight screens – high-contrast fabrics for ambient light
Further guides:
- How many lumens does a projector really need? A practical guide for every scenario – ANSI lumens per scenario, with real-world values
- World Cup 2026 projector guide – public viewing in the garden and living room
- Projector buying guide using the BEAM method – overview of all guides
