
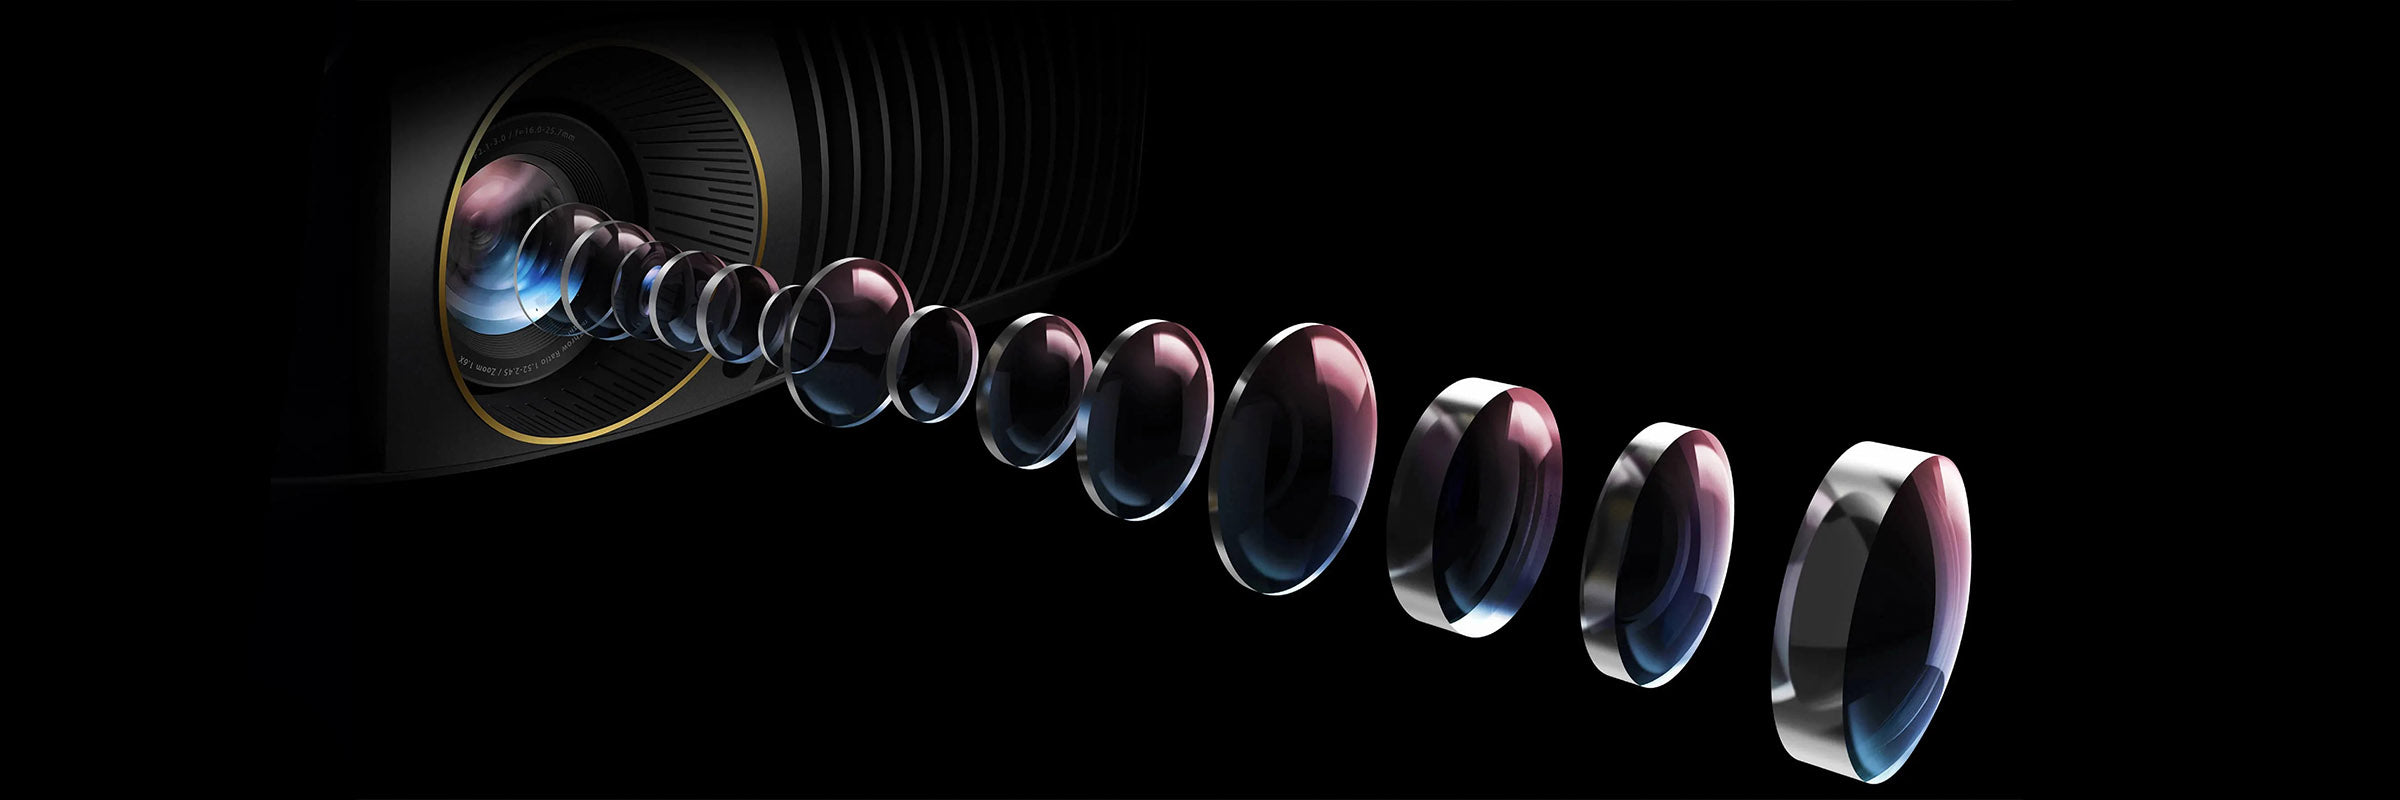
The most important question before buying a projector is rarely about resolution – it is this: Do you want to decide where the projector stands or hangs, or does its lens dictate the position? If you are designing an empty room from scratch, you can match projector and screen freely and will hardly need lens shift for more than fine adjustment. But as soon as ceiling lights, missing (or existing) cable ducts, a roof beam in the wrong place or a sofa that dictates the possible projector position have a say, the balance tips: lens shift is then no longer a convenience feature but decides whether your preferred projector can be placed in the planned position at all. A classic bad buy: the projector placed upright on the shelf behind the sofa – and because of the fixed built-in offset, the image ends up on the ceiling instead of the screen. This question belongs before every projector purchase, not after it. This guide shows how large the adjustment range needs to be for your specific installation, how to compare data sheet values from different manufacturers properly and why digital keystone correction is the inferior solution in any fixed installation – with concrete model examples from more than 25 years of advice at beamer-discount.de. The guide is deliberately detailed; for a quick buying decision, the quick decision table directly after the table of contents is enough – the detailed part is for anyone who wants to understand the background.
At a glance
- Lens shift is the opto-mechanical movement of the lens inside the projector – the image moves on the screen without any pixels being recalculated. Resolution, brightness and sharpness are fully preserved.
- Offset describes the static position of the image relative to the centre of the lens. An offset of 100 % means the bottom edge of the image is exactly level with the centre of the lens. DLP projectors often have offset values above 100 %.
- Data sheet values such as "103 ~ 118 %" are not a ± range, but the start and end points of a shift range. Calculate the difference between the two values – in this example it is only 15 percentage points, i.e. approx. 22.5 cm of shift travel with an image height of 150 cm.
- Vertical and horizontal shift limit each other – the lens mount is round. If you want to use both axes to the full, you will quickly run into the stop-sign pattern.
- Lens shift beats keystone correction in any fixed installation: optically lossless instead of digitally robbed of up to 50 % of the resolution.
- Quick decision: which lens shift for which installation?
- What is lens shift? What is offset?
- Reading data sheet values correctly
- Vertical, horizontal, both axes
- Lens shift classes on the market
- Lens shift vs. digital keystone correction
- When is lens shift essential, and when is less enough?
- Lens memory and CinemaScope home cinema
- The sweet-spot rule and picture quality at the maximum of the range
- Practical tips and typical installation mistakes
- Before you buy: lens shift checklist
- Advice and suitable projectors in our shop
Quick decision: which lens shift for which installation?
Three rules of thumb first:
- Lens shift is optically lossless – digital keystone correction costs resolution and creates a grey halo around the edge of the image in the dark. In home cinema and in any fixed installation, lens shift is the better choice.
- Data sheet values come in three notations (± range with Epson/JVC/Sony, position of the bottom edge of the image with Optoma/Acer, asymmetrical range with BenQ models such as the W4100i) – convert to a uniform notation before any comparison, otherwise you will be comparing unlike quantities.
- Lens shift becomes valuable when the lens has to end up at or near the centre of the image – e.g. a projector on a high sideboard behind the sofa. With very large distances between the lens and the desired image centre (very high ceilings), a long ceiling mount and a motorised screen with a black top drop are more reliable than any lens shift.
| Your installation | What you need | More |
|---|---|---|
| Dedicated cinema room, projector centred in front of the screen | Little lens shift – ±30 % vertical is enough | When less is enough |
| Living room, projector on a shelf to the side of the sofa | Horizontal lens shift essential | Asymmetrical installation |
| Projector on a 1.5–2 m high sideboard behind the sofa | Vertical lens shift with a large range, possibly with a negative range | Lens near the image centre |
| Very high ceiling (atrium, lounge, showroom, church) | Long ceiling mount + motorised screen with black top drop; lens shift for fine adjustment | Very high ceilings |
| Meeting room / fixed installation, possibly several projectors | Motorised lens shift with position memory | Meeting room |
| Laser TV / UST in the living room | No lens shift possible – millimetre-precise furniture planning + CLR screen | The UST special case |
If this overview has given you a clear direction, you can jump straight to the lens shift checklist or let our advice team guide you through your specific installation geometry. If you want to understand the background – why a projector's hard-coded offset is so limited, how the three data sheet notations relate to each other and which real-world tolerances lens shift actually absorbs in everyday use – read on.
What is lens shift? What is offset?
Before we look at lens shift in detail, it is worth taking a quick look at the projector as a whole. Basically, every projector – whether a mini LED model, a classic DLP home cinema projector or a professional installation unit – consists of three components arranged one behind the other in the light path:
- A light source (lamp, LED or laser)
- A display inside (DLP DMD chip, LCD panel or LCoS chip) on which the image is created pixel by pixel
- An optical system at the front (the lens) that magnifies the image and throws it onto the screen
Figuratively speaking, a projector is a camera in reverse: with a camera, the lens captures light from outside and throws it onto a sensor. With a projector, exactly the same light path runs in the opposite direction – the light source shines from behind through the internal display, and the lens throws the finished image outwards onto the wall. Once you have this three-component picture in mind, you will understand lens shift straight away.
Imagine shining a torch at the wall. The circle of light lands somewhere between ceiling and floor. You want it a little higher – but if you tilt the torch upwards, the circle becomes oval and blurred.
Projectors solve this more elegantly: you do not have to tilt the whole device at all. Instead, only the lens in front of the internal display is moved – like a carriage on a rail. To picture what happens, a second, very old analogy helps: the internal display works like a classic slide in a slide projector. The image is fixed on the film plane, every pixel in its place, the geometry unchangeable. If you want to place it higher or lower on the screen, you cannot change anything on the slide itself – so instead you move the lens in front of it sideways or vertically. The lamp's light still hits the slide evenly, but the now offset lens throws the image onto a different part of the wall. Native resolution, brightness and geometry are 100 % preserved – because no software intervenes in the image; the lens is physically moved. That is exactly what lens shift is: an opto-mechanical movement of the lens on a carriage inside the projector housing.
This gives rise to the most important installation rule of all: the projector should always be at right angles to the screen – neither turned to the side nor tilted up or down – and hang perfectly level, i.e. not rotated around its longitudinal axis. As soon as one of these three axes is out of line, the geometry starts to drift apart: the image becomes a trapezoid or a parallelogram, sharpness at the edges drops, and only digital keystone correction can recalculate the image back into a rectangle – with the pixel losses described later. Lens shift is the only method of moving the image on the screen without breaking this basic rule.
"Keystone correction is pixel theft – lens shift is optical freedom."
A second peculiarity is linked to this, and almost nobody explains it: offset. Projectors do not shine straight out of the lens, but slightly upwards. This is intentional. If you put the projector on a living room table and it shone straight ahead, the image would fall on the table instead of the wall. So that the image reaches the wall above the projector, the lens is designed to throw the light a few centimetres higher than its own centre.
The offset value is given as a percentage of the image height. Three reference points make the system easy to understand:
- 50 %: the centre of the lens is exactly at the centre of the image (the image is symmetrical around the lens)
- 100 %: the centre of the lens is exactly level with the bottom edge of the image (the whole image is above the lens – typical of DLP when placed on a table)
- >100 %: the bottom edge of the image is above the centre of the lens by the excess percentage points (e.g. at 118 % the bottom edge of the image is 18 % of the image height above the lens)
The rule-of-thumb formula for the vertical offset between the centre of the lens and the centre of the image is:
Vertical offset = image height × (offset% − 50) ÷ 100
For a projector with 60 % offset and an image height of 150 cm, this gives: 150 × (60 − 50) / 100 = 15 cm. The lens is 15 cm below the centre of the image.
Reading data sheet values correctly
Now for the important part. Sometimes you read in a data sheet:
Vertical lens shift: 103 ~ 118 %
At first glance this looks like plenty of leeway – over a hundred percent sounds like more than a whole image. In fact, these two numbers describe the two end points between which the lens can travel on its internal carriage. And the difference between 103 and 118 is only 15 percentage points. That is the entire distance the carriage can travel.
How much is that in the real world? With an image height of 150 cm (roughly a 120″ diagonal in 16:9 format, i.e. approx. 2.7 m image width), 15 % of 150 cm equals 22.5 cm. So you can only move the image 22.5 centimetres up or down. If you place the projector 30 cm too high or too low, the image will no longer fit on the screen.
A concrete model example: the Optoma UHZ58LV is a dual-laser 4K home cinema projector with a strong picture and an exceptionally good choice in its class – only the way the lens shift value is written in the data sheet regularly leads to misunderstandings. It says "103 ~ 118 %", which at first sounds like plenty of leeway. In fact it means: bottom edge of the image between 3 % and 18 % of the image height above the centre of the lens. Effective shift range: 15 percentage points – i.e. 22.5 cm with an image height of 150 cm. Horizontal lens shift is not provided; the projector is planned centrally to the screen. This kind of small, targeted adjustment range is known in the trade as fine-adjustment shift: enough to correct an inaccurately drilled ceiling mount by a few centimetres – in line with the usage profile of a device that is set up in a planned, fixed home cinema position anyway. If, on the other hand, you are planning asymmetrical installations in your living room from the outset, look for a range of at least ±30 % vertical when comparing data sheets (in the ± range notation used by Epson, JVC and Sony) – that is a different class of projector, not a shortcoming of the UHZ58LV.
Important: the notation "103 ~ 118 %" is only one of several possible notations – depending on the manufacturer, the same thing is presented very differently. Three typical variants show the spectrum:
- ± range around the centre position (Epson, JVC, Sony): e.g. "±96.3 % vertical / ±47.1 % horizontal" – the most reader-friendly form, because the usable leeway can be read off directly.
- Position of the bottom edge of the image as a percentage of image height (Optoma, some Acer models): e.g. "103 ~ 118 %" – as shown above, here you need to calculate the difference, not use the numbers themselves.
- Asymmetrical range with sign (e.g. BenQ W4100i): "0 to +60 %" – the shift only goes in one direction, which is easily overlooked when reading quickly.
Important: the same percentage means very different ranges of movement in the three notations. "±50 %" in the ± range notation corresponds to a total shift of 100 % of the image height (50 % up plus 50 % down). "50 %" in the bottom-edge notation can mean only a few percentage points of effective movement, depending on the starting value – see the Optoma example with 15 percentage points between 103 and 118. If you compare without converting, you will systematically misjudge the lens shift range.
Some manufacturers also include a shift diagram in the data sheet, others only a pair of numbers without further explanation. If you want to know, when comparing two models, whether the values even mean the same thing, contact our projector advice team before you buy – we will be happy to convert the data sheet values to your specific installation and compare models on a uniform basis.
A second pitfall: data sheet values always apply to table placement. With ceiling mounting, the projector is upside down and the geometry is automatically mirrored – a table offset of 118 % becomes the corresponding downward offset with ceiling mounting. This is intended by design, but confusing on first reading.
One last recommendation from our day-to-day advice: for precise installation planning, the manufacturer's manual is a better source than the data sheet – it contains the specific lens shift, offset and throw distance tables with millimetre figures for every image size, often including diagrams for ceiling and table mounting. Data sheets only give the key values; the manual shows every intermediate step. If values contradict each other, always use the latest manufacturer's manual for your own region (DE/EU) as the reference.
Vertical, horizontal, both axes
Lens shift comes in two versions: vertical (the image moves up or down) and horizontal (the image moves left or right). Mechanically, both work the same way – the lens is moved within the projector housing. However, the horizontal range is considerably smaller than the vertical one in almost all projectors, often only a third to a quarter. The reason lies in the design: lens elements are round.
"Vertical and horizontal shift limit each other – the lens is a circle, not a square."
What does that mean in practice? If you are already making heavy use of vertical lens shift, the lens moves towards the edge of its circular housing. In this position, horizontal shift is often no longer possible. The usable range of both axes together is therefore not a rectangle, but rather a rounded octagon or a "stop-sign pattern": at the vertical maximum there is no horizontal leeway left, and vice versa.
If you buy a projector with large lens shift values on both axes, factor this into your considerations. Two example models from the upper home cinema class show how much leeway is possible with premium 3LCD and LCoS:
- Epson EH-LS12000B (3LCD, motorised): ±96.3 % vertical / ±47.1 % horizontal
- JVC DLA-NZ800 (D-ILA, motorised): ±80 % vertical / ±34 % horizontal
Both models allow almost any installation position in the living room – including off-centre to the screen, on the ceiling next to a beam or in a sideboard. However, the values only apply when the other axis is at zero. In practice, it is advisable to leave some reserve before the mechanical stop and not to go to the absolute maximum.
Lens shift classes on the market
Which lens shift range is standard in which class? The following table gives a rough guide – the specific values are always in the data sheet of the respective model.
| Class | Typical vertical range | Typical horizontal range |
|---|---|---|
| Entry-level home cinema (DLP, small models) | usually 0 % (no shift – installation height results from the fixed offset) | usually 0 % |
| Mid-range home cinema (3LCD, upper-range DLP) | approx. ±30 to ±50 % | approx. ±10 to ±25 % |
| Upper-class home cinema (premium 3LCD) | up to ±96 % | up to ±47 % |
| High-end (LCoS, JVC D-ILA, Sony SXRD) | approx. ±80 % | approx. ±34 % |
| Installation projector (with fixed lens) | up to approx. ±60 % | up to approx. ±20 % |
| Installation projector (with interchangeable lens) | lens-dependent, considerably extendable | lens-dependent |
A special form are asymmetrical lens shift models whose adjustment range only goes in one direction. One example is the BenQ W4100i: its vertical shift ranges from 0 to +60 %, i.e. only upwards, not downwards. If this projector stands in a low sideboard, the image cannot be moved further down – the only solution is upside-down ceiling mounting, where the geometry is automatically mirrored. Asymmetry and price segment are independent of each other: even mid-range models with a significant premium can have one-sided shift ranges. So before buying, always check the sign in the data sheet, not just the percentage.
At the other end of the scale are projectors without any lens shift – typically entry-level home cinema models (DLP), compact, business and ultra short throw models. They often have a very high fixed offset and must be set up precisely. The Optoma UZ38x, for example, an entry-level 4K UHD home cinema laser projector, has a native offset of 105 % and no shift – the installation height must be planned to the centimetre before set-up, because any subsequent correction is only possible via the physical position.
Special case ultra short throw (UST and laser TV): With genuine UST projectors – whether as a pure projector in a B2B installation or as an all-in-one laser TV in the living room – the lack of lens shift is not accidental but inherent in the design. Both types of device stand directly in front of the wall and project upwards at an extremely steep angle; their optics are pushed so far that there is practically no mechanical leeway for additional shift. The practical consequence: UST and laser TV devices need millimetre-precise furniture planning – in two dimensions at the same time. Firstly, the furniture height determines where the bottom edge of the image begins on the wall. The vertical distance between the surface of the piece of furniture and the bottom edge of the image is dictated by the projector's fixed offset – a model-specific value that remains exactly the same with every set-up and cannot be corrected without lens shift. So if the laser TV stands on a 40 cm lowboard, the whole image sits 20 cm lower than on a 60 cm sideboard. Secondly, the depth of the furniture, i.e. the distance from the projector to the wall, determines the image size: just a few centimetres more or less distance from the wall makes a difference of several inches in diagonal. In the living room, this mainly concerns the lowboard or sideboard that carries the laser TV – in B2B set-ups, correspondingly, the reception desk, lounge sideboard or meeting room furniture. In all cases, the height and wall distance of the furniture should always be defined before buying the furniture and passed on to the joiner or interior designer – otherwise either the screen (or the wall position) has to move, or the furniture has to be raised or moved away from the wall afterwards. In the product descriptions of our laser TVs in our shop you will find a specific table for each model with the relevant distances (meaning both the wall distance and the vertical offset to the bottom edge of the image) – if in doubt, also consult the manufacturer's manual or our customer advisers. In addition, UST and laser TV devices only achieve optimum picture quality in combination with a CLR screen (ceiling light rejecting), which is specially optimised for extremely flat projection from below: it reflects the light coming from the projector precisely towards the viewer and blocks stray light from above (ceiling lights, daylight). On a normal screen, a large part of the light output is wasted – you will find suitable models in our laser TV / CLR screens category.
Lens shift vs. digital keystone correction
There is a second way of straightening a skewed projector image: digital keystone correction. Here the projector does not redirect the light, but recalculates the image internally so that it looks rectangular from every angle.
Imagine the display inside the projector as a classic slide: the image is fixed on the film plane – every pixel in its place, the geometry unchangeable. If you place the projector at an angle to the wall, you can no longer change anything on the "slide" itself. The only option is to mask out the edge areas and deliberately distort the remaining image internally so that it appears rectangular again on the wall after the angled projection. That is exactly what keystone correction does – it sacrifices pixels at the edge of the image and bends the rest into shape.
It sounds clever, but it has noticeable disadvantages. To put it figuratively: lens shift is the carriage that cleanly moves the lens to the side in front of the slide – everything stays sharp. Keystone correction is digital image distortion that skews the image, rescales it and swallows pixels in the process.
Specifically, it costs resolution: up to a correction angle of approx. 10–15°, the losses of 15–20 % of the pixel area are still tolerable for films; from 20°, the blurring becomes clearly visible, and with extreme correction only around 720p effectively remains of 1080p. Detailed correction angle tables, the auto keystone function, 4-point and multi-point geometry correction and edge warping are covered in detail in our keystone guide.
Two effects, however, are so important for the lens shift buying decision that they belong here:
- Light halo or ghost frame: when an image is digitally keystone-corrected, the projector switches the deactivated edge pixels to black – with DLP by tilting the mirrors away, with LCD/LCoS by switching the pixels to black. But because no display achieves perfect black, residual light from the light source continues to shine through, creating a light grey trapezoidal frame around the active image, known in the trade as a halo, light halo or ghost frame. In a bright living room this is hardly noticeable – but in a darkened home cinema room it is immediately obvious, because the black level visibly suffers.
- Focus non-uniformity: when the lens is at an angle to the wall (as is structurally the case with any keystone correction), the distances to the top and bottom edges of the image differ. If you focus the centre, the edges become physically blurred – this is due to optics and cannot be corrected by any software. In practice, the effect is often hardly noticeable with conventional long-throw projectors and moderate correction angles, because their depth of field is large enough – with ultra short throw models or strong keystone correction, however, it becomes clearly visible. This is precisely the technical reason for the perpendicular rule above: projector at right angles to the screen – anything else means loss of pixels plus loss of sharpness.
"Keystone correction leaves a grey ghost frame that destroys the black in your home cinema."
The rule of thumb is: avoid keystone in any fixed installation where picture quality matters – i.e. home cinema, dedicated gaming and professional installations. For mobile use, spontaneous set-ups and really cramped rooms, keystone remains a useful tool.
When is lens shift essential, and when is less enough?
Not every installation needs the largest available lens shift range. Three scenarios show when the feature is critical and when a smaller range is sufficient:
Essential: asymmetrical living room installation. If you place the projector on a shelf to the side of the sofa, you absolutely need horizontal lens shift. Without horizontal shift, the projector must either stand centred in front of the screen or the image is skewed by digital keystone correction – with the resolution losses described above. The same applies if the ceiling joist position is off the centre of the screen. In existing rooms with lamps, ventilation outlets or fixed furniture, two-axis lens shift is often the only way of getting a clean picture without building work.
Essential: meeting rooms and fixed installations. In professional set-ups – meeting room, training room, museum, control room – lens shift is non-negotiable. Firstly, because digital correction leads to visible artefacts and halo effects in continuous operation. Secondly, because the position must be restored exactly after maintenance – which only works reliably with motorised lens shift with position memory. With multi-projector set-ups such as edge blending or stacking, stored shift is even mandatory.
Essential: the lens needs to be closer to the image centre than the hard-coded offset allows. This is where the real USP of lens shift over fixed-offset projectors lies – and in practice it is often misunderstood. First, understand the geometry: both lens shift and fixed-offset projectors can only position the image geometrically within a limited range relative to the lens – typically a maximum of about one image height between the lens and the centre of the image. Even premium lens shift models such as the Epson EH-LS12000B with ±96 % vertical can only move the lens to about half an image height above or below the edge of the image. Mechanically, that is the limit. Fixed-offset projectors also anchor the lens in a hard-coded position at or just outside the edge of the image (a typical DLP offset of 105 or 118 % means: lens 5–18 % of the image height away from the edge of the image). Lens shift therefore becomes indispensable precisely when the lens must not sit near an edge of the image, but has to be further towards the centre of the image or even on the "wrong side". Three classic cases:
- Projector on a hip-high sideboard (~1.5 m) behind the sofa. The centre of the image should be roughly at the eye level of viewers sitting on the sofa – i.e. almost at the height of the lens itself. A fixed-offset projector with 118 % would shoot the image right over their heads. With vertical lens shift, the lens can be moved to or slightly above the centre of the image, and the image stays at eye level.
- Projector on tall furniture (1.8–2 m), feet down. The image should hang considerably lower than the lens – so the lens must be above the centre of the image. A fixed-offset DLP would inevitably throw the image upwards (towards the ceiling). Only vertical lens shift with a large negative (i.e. "downward") range can position the image downwards relative to the lens.
- Low home cinema (approx. 2 m ceiling height), ceiling mount with a short pole. The lens hangs just below the ceiling, but the image should reach almost up to the ceiling. The lens must therefore sit in the top third of the image or right at the top edge. With a fixed-offset DLP at 118 %, there is always a clear strip left between the top edge of the image and the ceiling – with vertical lens shift, the lens can be moved close to the top edge of the image, so the image "climbs" right up to the ceiling.
In all these cases, a fixed-offset projector can not bring the image to the desired position – no matter how cleverly it is planned. Lens shift is essential. Remember: lens shift becomes valuable when the lens needs to be closer to the centre of the image (or on the "wrong side" of the image) than the hard-coded offset allows – not when it hangs far away from the image.
Very high ceilings: lens shift needs reinforcement here. Rooms with exceptionally high ceilings (atrium, stairwell, open lounge, showroom with gallery, church) look at first glance like a classic lens shift case – in fact, lens shift and fixed-offset projectors face the same challenge here: the geometric reach of both designs is not enough on its own to compensate for a lens position several metres above the desired centre of the image. In such rooms, lens shift takes care of fine adjustment – the large height compensation is handled by two additional tools that combine well with lens shift:
- Long ceiling mount (telescopic or drop bar): mechanically brings the lens itself lower into the room. Effective and reliable, but unstable and unattractive with long extensions.
- Motorised screen with a long black top drop: the screen housing hangs directly on the high ceiling, but the actual screen fabric extends a good deal lower thanks to a section of black top drop before the projected image area begins. This way the image does not "stick" to the ceiling but hangs at the desired eye level – regardless of the projector offset or lens shift. Suitable fabrics with a long black top drop can be found in our motorised screens category.
At the other end of the scale – for example in basement home cinemas with a ceiling height of only approx. 2 m – the problem is exactly the opposite: here long mounts and drop screens can hardly be used (no room below), but lens shift becomes the main player again, because the low ceiling means the lens is close to the desired image position anyway – the "low home cinema" example described above is exactly this case.
Less is enough: dedicated home cinema room with central ceiling or table mounting. If you are building your own cinema room and centre the projector on the screen from the outset, a moderate vertical range will do. Here ±30 to ±50 % vertical is usually comfortably enough for typical ceiling mounting. Horizontal shift can be dispensed with – but only as long as it is clear that the room will not be remodelled later.
Essential (additionally): CinemaScope home cinema with masking screen. If you run a 21:9 screen with lens memory – i.e. automatic switching between 16:9 and 2.35:1 – you need motorised lens shift, motorised zoom and motorised focus. More on this in the next section.
Lens memory and CinemaScope home cinema
Lens memory is a feature that brings out the full potential of lens shift: the projector saves a complete image geometry configuration – zoom, focus and lens shift position – as a preset and recalls it at the touch of a button. The number one use case is the CinemaScope home cinema with a CIH set-up (constant image height): a screen in 2.35:1 format is set up so that widescreen films fill the full width of the screen, while 16:9 content runs at full height within the 2.35:1 area.
For this to work, the projector moves to a different zoom level, a different focus setting and a different image position for each format – all at the touch of a button instead of manually. Requirement: motorised zoom, motorised focus and ideally motorised lens shift. This combination is typically available on upper-class home cinema models from the mid four-figure price range upwards.
What exactly does "motorised" mean? With manual lens shift, zoom or focus, the user turns dials or sliders directly on the top of the projector or on the lens. With the motorised version, small servo motors in the projector housing take over this task – adjustment is done by remote control or via the on-screen menu, without a ladder, without touching the projector and without the risk of knocking the focus out while turning. Only then can a stored position (lens memory in home cinema, position memory in fixed installations) be precisely restored at the touch of a button – manually this is practically impossible, because the exact dial setting can hardly be reproduced after maintenance or an accidental knock.
Compared with the classic alternative – an anamorphic lens attachment – lens memory is the much more affordable solution: the feature is built into the projector, no additional glass is placed in the light path, and no recalibration of the optical set-up is needed after servicing or a power cut. In theory, an anamorphic lens delivers more brightness on the 2.35:1 area, but it costs extra in the low four-figure range and requires a more complex set-up.
The sweet-spot rule and picture quality at the maximum of the range
Lens shift works optically, not digitally – but that does not mean it should be pushed as far as you like. When the lens is at its mechanical stop, the light passes through the outermost areas of the lens. Three effects can then become visible:
- Chromatic aberration: slight colour fringes along high-contrast edges
- Loss of sharpness in the corners of the image
- Uneven brightness distribution (vignetting)
The rule of thumb is: operate the lens in the middle of the mechanical range wherever possible, not at the outer end points. In the middle, picture quality is optimal; towards the edges, the effects mentioned can become increasingly noticeable. In practice this means: if you buy a projector with a large shift range and permanently run it almost fully extended, you may see optical losses – if you run the same projector with a comfortable reserve, you get optically clean picture quality.
This principle is also an argument for more range than you need: a model with a large lens shift range lets you work in the optically best range while having enough reserve for later room changes or a move. Future-proofing that does not immediately appear as a plus point in the data sheet.
Practical tips and typical installation mistakes
In our day-to-day advice, seven typical mistakes keep cropping up – and they can all be avoided:
1. Lens shift data sheet not read, or read incorrectly. Values such as "103 ~ 118 %" are often misinterpreted as a large range. Always calculate the difference between the two values, not the numbers themselves. Whenever you compare projectors: only compare values that use the same notation (either both as image position like Optoma, or both as ± range like JVC and Epson).
2. Asymmetrical lens shift overlooked. Models with one-sided shift (e.g. "0 to +60 %") only allow movement in one direction. From a low sideboard position, the image cannot be moved downwards – unless the projector is mounted upside down on the ceiling. One example is the BenQ W4100i. For buyers who absolutely want a particular table or shelf position, the one-sided range is the most important data sheet detail.
"10 % lens shift is not an installation aid, merely a way of correcting inaccurate mounting."
3. Lens shift confused with throw ratio. Lens shift only moves the finished image in parallel – it changes neither the installation distance nor the image size. That is the job of the zoom range. If you need a short installation distance, look at the throw ratio, not the lens shift. More in our throw ratio guide. With interchangeable-lens projectors – typical in installation applications – the usable lens shift range also depends on the lens: when planning, always check the data sheet of the lens actually used, not the projector's maximum value.
4. Manual lens shift without position memory. During maintenance or a lamp change, manual shift dials are often accidentally moved – the exact image position is then lost. For fixed installations, multi-projector set-ups (edge blending, stacking) and anything maintenance-intensive, motorised lens shift with position memory is strongly recommended.
5. Table/ceiling mirroring overlooked. All lens shift and offset values in the data sheet apply to table placement with the feet down. As soon as the projector is mounted upside down on the ceiling, the entire geometry is automatically mirrored: "image is 18 % above the centre of the lens" (table offset 118 %) becomes "image is 18 % below the centre of the lens". An asymmetrical shift of "0 to +60 %" becomes "0 to −60 %" with ceiling mounting. The practical consequence: a projector that cannot move the image down when placed on a table can do so when ceiling-mounted – and vice versa. Before buying, always think through which way up the projector will ultimately be mounted, and mentally mirror the data sheet values.
6. Cable outlet at the back forgotten. On most projectors, the HDMI, power and trigger connections are at the back of the housing. If you plan to put the projector in a shelf recess, against a wall or in a sideboard with a back panel, you need to allow at least 8–12 cm for the plugged-in cables in addition to the space for the device itself – correspondingly more with thick HDMI cables, angled adapters or pre-made lengths. This reserve automatically moves the projector forwards and therefore closer to the screen: the effective throw distance becomes shorter than planned, and the usable image size changes. If you overlook this, you buy a projector with a throw ratio that only just fits and only notice during set-up that the image is too large for the screen. More in our throw ratio guide.
7. Real-world tolerances underestimated – and how lens shift absorbs them. In practice, furniture, walls and mounts can rarely be planned to the millimetre. Joiner-made furniture has typical manufacturing tolerances, mass-produced furniture considerably more. Uneven screed, curved walls and plaster tolerances quickly amount to several millimetres per metre. Drill holes for ceiling mounts rarely end up exactly where the plan intended. All in all, a deviation of one to two centimetres between the installation plan and the built reality is the norm, not the exception. With projectors with lens shift this is not critical – the optical shift easily compensates for such tolerances without anyone having to reach for a tool. This is where the real everyday value of the feature lies: not the exotic asymmetrical living room installation, but the perfectly ordinary "my drill hole is a fraction too low" case. With projectors without lens shift (entry-level home cinema DLP, UST and laser TV), on the other hand, this tolerance has to be absorbed elsewhere – with height-adjustable furniture feet, shims, adjustable ceiling mounts or a trial set-up before finally fixing the furniture or wall position.
Two additional practical tips for planning before you buy:
- Measure the geometry: bottom edge of the screen in cm, seat height, planned projector position and table or ceiling height. Run through the calculation once with the offset figure and the lens shift range of your preferred model before ordering. Ten minutes with a tape measure saves three days of handling a return. If you would also like to determine the right image size for your seating distance at the same time, you will find the formulas you need in our screen distance guide.
- Plan in reserve: with fixed installations, allow enough reserve before the mechanical stop so that later readjustments remain possible without a new projector. For living room installations, the sweet-spot rule is usually sufficient (operate the projector in the middle of its range, not at the end points).
"Avoid keystone at all costs if you want to see the full sharpness of your 4K panel."
Before you buy: lens shift checklist
Nine questions that should be answered before every projector order. If you have worked through all the points carefully, you will avoid the most common lens shift bad buys – and, if in doubt, come to our advice team with concrete data.
- ☐ Rough installation location clear? Table, sideboard, shelf behind the sofa, ceiling at the front, ceiling at the back?
- ☐ Centred or offset? Is the planned installation location horizontally centred in front of the screen and vertically centred on the screen height – or offset? If offset: only vertically, only horizontally, or both?
- ☐ Clean geometry possible? Can the projector be placed or hung at right angles to the screen and perfectly level, without tilting it around any of the three axes?
- ☐ Obstacles at the preferred position? Ceiling lights, roof beams, ventilation outlets, cable ducts, sideboard height, sofa in the light path?
- ☐ Reserve depth for cables? Have you allowed at least 8–12 cm behind the projector for plugged-in HDMI, power and trigger cables – more for thick cables or angled adapters? (This directly affects the effective throw distance and therefore the image size – details in our throw ratio guide.)
- ☐ Table or ceiling? Will the projector be mounted upright or upside down – and have you mentally mirrored the data sheet values accordingly in your calculations?
- ☐ CinemaScope planned? Should 16:9 and 2.35:1 be switched automatically later on? Then motorised lens shift with lens memory is essential – plus motorised zoom and focus.
- ☐ Data sheets comparable? Have the lens shift values of competing models been converted to a uniform notation (± range vs. bottom-edge position vs. asymmetrical range with sign)?
- ☐ If in doubt: checked the manufacturer's manual – or asked our projector advice team directly?
If you get stuck on any of these questions, have a quick chat with our advice team before ordering about which projector suits your specific installation – if in doubt, that is cheaper than any return.
Frequently asked questions (FAQ)
Why do I need lens shift at all?
Lens shift moves the projected image on the screen without the projector itself having to be moved or tilted – and without any loss of picture quality. This is always necessary when the projector is horizontally off-centre to the screen (e.g. sideboard to the side of the sofa, ceiling joist not at the centre of the screen) or does not hang at the ideal vertical height (e.g. high ceiling in a lounge or stairwell, fixed furniture height with a sideboard or lowboard installation). Without lens shift, there are only three ways out in such situations: digital keystone correction (with loss of resolution and a grey residual light halo), a long telescopic ceiling mount as purely mechanical compensation, or a motorised screen with a long black top drop that brings the bottom edge of the image lower into the room. Lens shift is the optically lossless solution and, in most living rooms and meeting rooms, the most straightforward.
What is the difference between lens shift and keystone correction?
Lens shift is an opto-mechanical movement of the lens inside the projector – the image moves on the screen without any pixels being recalculated. Resolution, brightness and sharpness are fully preserved. Keystone correction is a pure software function: it compresses the image digitally and switches off edge pixels, which leads to loss of resolution, loss of sharpness and a grey residual light halo in the dark. In a fixed installation, lens shift is always the better choice.
How much lens shift do I really need?
That depends on your specific installation. For a home cinema with a central ceiling or table position, a moderate adjustment range is perfectly sufficient. For asymmetrical living room installations (e.g. projector on a shelf to the side of the sofa), horizontal lens shift is essential. For meeting rooms with fixed obstacles on the ceiling (beams, lights, ventilation), both axes should be generously dimensioned. If you want to run a CinemaScope screen with automatic format switching, you also need motorised lens shift, zoom and focus. You will find specific percentage recommendations in the main article – but when directly comparing data sheets from different manufacturers, be sure to convert to a uniform notation, otherwise you will be comparing unlike quantities.
What does an offset of 105 % or 118 % mean?
Offset indicates the static position of the bottom edge of the image relative to the centre of the lens. At 50 %, the lens is exactly at the centre of the image; at 100 %, the bottom edge of the image is level with the centre of the lens; and values above 100 % mean that the bottom edge of the image is above the centre of the lens by the excess percentage points. At 118 % and an image height of 100 cm, that is 18 cm. High offset values are typical of DLP projectors placed on a table – the image is thrown upwards so that it does not land on the table. With ceiling mounting, the geometry is automatically mirrored.
Why is horizontal lens shift smaller than vertical?
Lens elements are round, but the projected image is rectangular – and in 16:9 format it is also wider than it is high. For the image to fit completely into the lens's round cone of light, there is less leeway to the edge of the lens on the left and right than at the top and bottom. When the lens is moved out of the centred position, it therefore reaches the edge of its circular housing horizontally after a shorter distance; vertically it has considerably more room. The maximum shift of both axes combined therefore does not form a rectangle, but rather a rounded octagon – at the vertical maximum, no horizontal leeway is possible. Data sheets usually list the maximum values of the two axes separately, which can suggest that both can be used at the same time. Before making a purchase decision, it is worth looking at the detailed specification, where the combined ranges are shown.
Does lens shift affect picture quality?
Not with moderate use in the middle of the mechanical range. The further the lens is pushed, the more chromatic aberration, loss of sharpness in the corners and slight drops in brightness can occur. The rule of thumb is: work in the middle of the range wherever possible and do not go to the mechanical stop. If you follow this rule, you will not see any optical losses.
Is motorised lens shift worth it compared with manual?
For the one-off adjustment of a permanently installed home cinema projector, manual shift is perfectly adequate. Motorised becomes interesting if you readjust frequently (CinemaScope set-up with lens memory), if the projector is difficult to access (high ceiling, built-in installation) or if the position must be exactly restorable after maintenance (multi-projector installations, edge blending).
Advice and suitable projectors in our shop
Lens shift is one of those topics where a few minutes of advice at the start save a lot of effort and follow-up costs at the end. Our projector specialists will be happy to work through your specific installation geometry with you – bottom edge of the screen, seat height, planned projector position – and suggest suitable models from our range.
Tip for the home cinema living room: models with two-axis lens shift (vertical + horizontal) and a range of at least ±50 % vertical give you the flexibility to install the projector off-centre as well. For most living room set-ups, this is the right choice.
Tip for the dedicated cinema room: in home cinema rooms with central ceiling or table mounting, moderate range values (±30 to ±50 % vertical) are comfortably sufficient. Here, black level, colour accuracy and noise level matter more than maximum lens shift.
Tip for CinemaScope set-ups: if you opt for a 21:9 screen with automatic format switching, you need motorised lens shift combined with motorised zoom and focus. More details in our lens memory guide.
Tip for fixed installations and meeting rooms: go for motorised lens shift with position memory and allow a comfortable reserve before the mechanical stop, so that later adjustments remain possible at any time. With interchangeable-lens models, check the data sheet of the lens actually used, not the projector's maximum value.
Further guides:
- Projector keystone correction in detail
- Understanding throw ratio
- Projector ceiling mounting step by step
- Lens memory and CinemaScope home cinema
- DLP projector guide
