
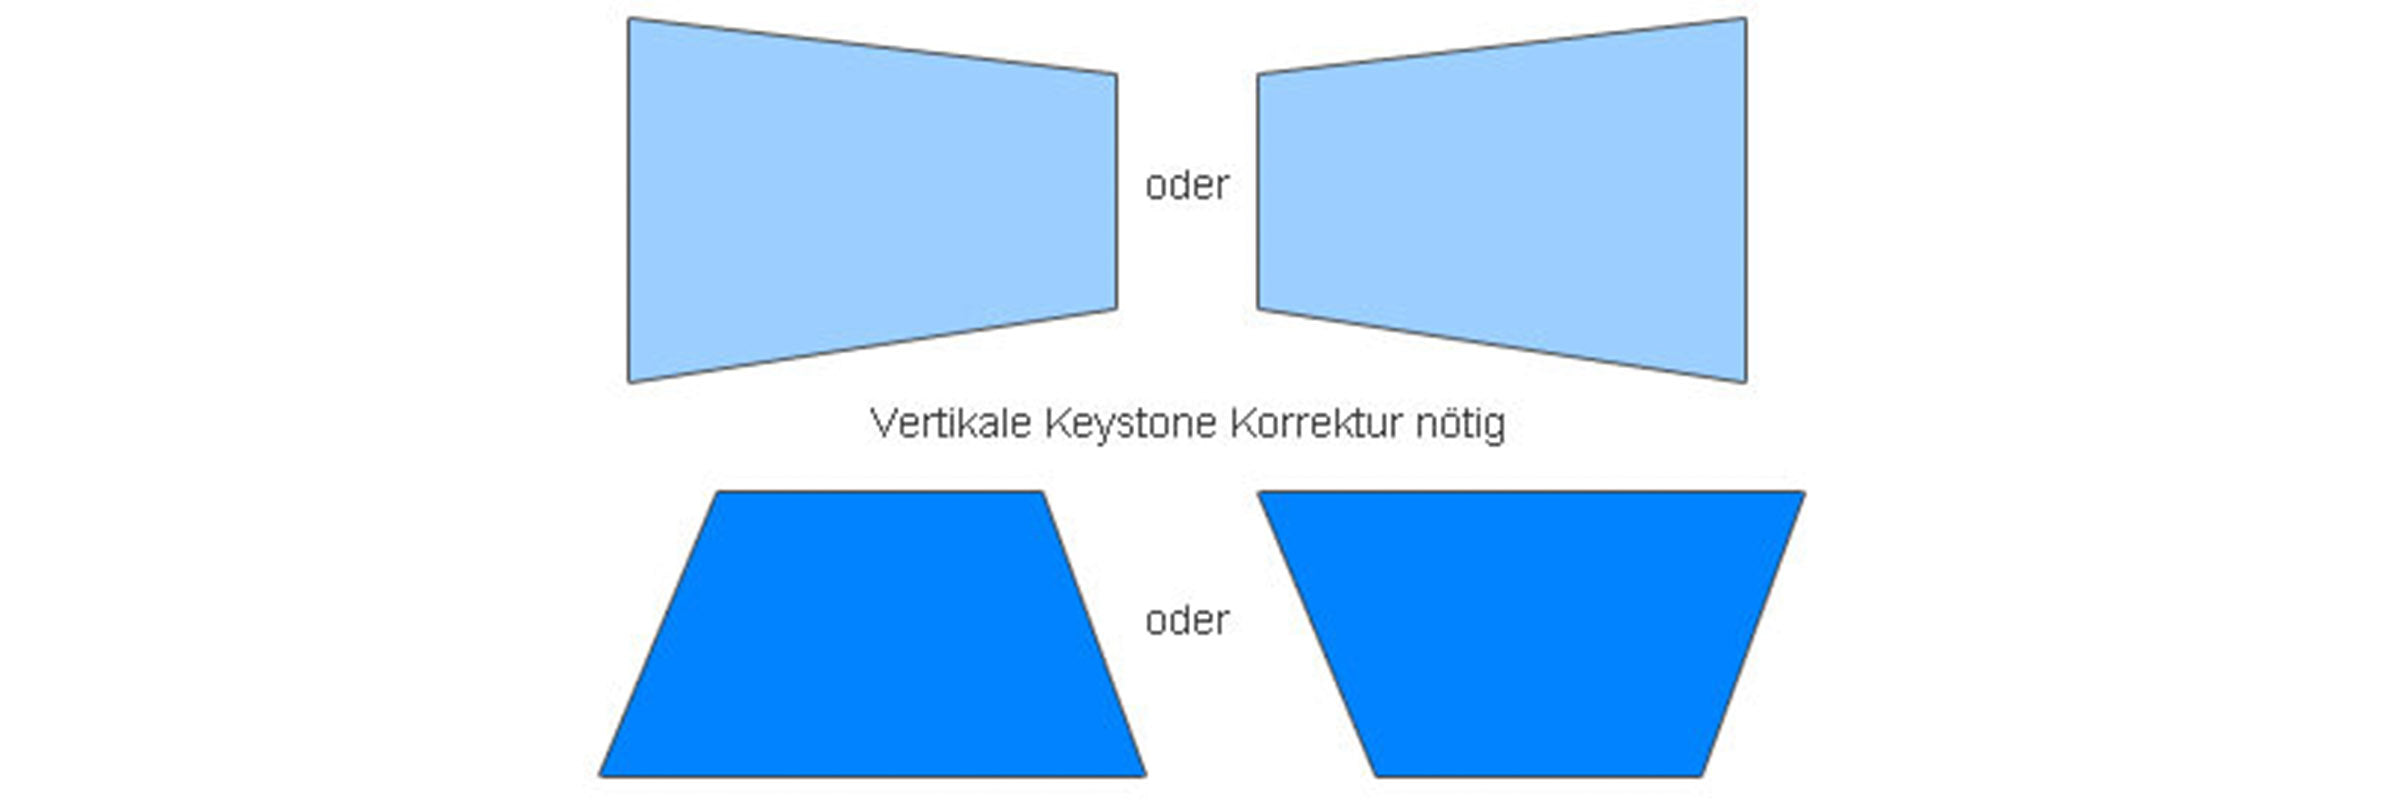
The projector is set up and the image is shining on the wall – but instead of a rectangle you see a trapezoid. One press of the keystone button and the image is straight – job done? At first glance, yes. But keystone correction in a projector does more than most buyers suspect: the digital correction recalculates pixels, switches off edge areas and changes sharpness, brightness and image geometry. This guide explains what actually happens during keystone correction, how much correction your projector can tolerate and when an optical solution is the better choice.
At a glance
- Keystone correction digitally straightens a trapezoidal image – practical, but with a loss of quality.
- Up to a 10° correction angle the loss is barely visible with films. From 15° it becomes critical, from 20° clearly noticeable.
- Five side effects are not apparent from the data sheet: halo, uneven focus, loss of brightness, artefacts and input lag.
- Lens shift is the lossless alternative: the lens moves the image mechanically without recalculating a single pixel.
- Practical limit: Stay below 10°. Beyond that, it is worth choosing a projector with lens shift.
- What is keystone correction?
- Quick check: is keystone enough for my setup?
- Five side effects of digital correction
- How much resolution does keystone cost?
- Practical tips: minimising keystone losses
- Gaming and keystone
- 4-point correction and geometry warping
- Lens shift: the optical alternative
- Frequently asked questions (FAQ)
- Advice and suitable projectors in the shop
What is keystone correction?
If a projector is set up at an angle or does not stand exactly at right angles to the projection surface, the result is a trapezoidal image. Wider at the top than at the bottom, one side longer than the other – depending on the setup angle. The name comes from the word keystone (the central stone in an arch), which has exactly this trapezoidal shape.

Why do so many projectors need keystone correction? Most projectors do not project the image straight ahead but slightly upwards. This so-called fixed offset is intentional: it ensures that, when placed on a table, the image appears on the wall above the device and not at table height. With ceiling mounting the principle works the other way round – the projector hangs upside down (feet up), and the offset throws the image down onto the screen. To bring the image to the desired height on the wall, the projector is then tilted slightly – upwards when on a table, downwards when ceiling-mounted. Because of this tilting, the light beam no longer hits the wall at a right angle, and that is exactly what causes the typical trapezoidal distortion. Keystone correction compensates for this effect digitally.
The most common setup mistake we see in our advice: If you place a fixed-offset projector upright on a high shelf, it projects the image past the screen onto the ceiling – the upward offset works against you. Keystone correction is then used as a stopgap, even though correct mounting (upside down on a ceiling mount + switching to “ceiling mount” in the menu) would have avoided the issue from the outset. And please don’t get the idea of putting the projector upside down on the shelf: many devices dissipate their heat through the top, and a shelf without sufficient ventilation on all sides can lead to overheating and device damage not covered by the warranty.
To understand what the correction does in the projector, it helps to look inside: at its core, every projector consists of three components – light source, imaging unit (DLP chip, LCD panel or LCoS panel) and optics (lens). For simplicity’s sake, we can think of the imaging unit as a classic slide film: every pixel sits in a fixed place, and the geometry cannot be changed. With angled projection, the projector cannot change anything on the imaging unit itself. It has two ways of getting the image straight nonetheless:
- Digital keystone correction: The software recalculates the image before it appears on the imaging unit. It compresses one side, blanks out edge pixels and distorts the interior so that it looks rectangular again on the wall after angled projection. This costs pixels – and with them resolution, sharpness and brightness.
- Optical shift (lens shift): The lens sits on a mechanical carriage and is physically moved. The image moves on the screen without a single pixel being recalculated. Resolution, brightness and geometry are fully preserved. Important: lens shift does not correct an angled position – the projector must still be square to the screen. However, lens shift gives you leeway in the mounting height, so the projector does not have to be mounted exactly at the position dictated by the lens. This makes setup considerably more flexible – and in most cases makes digital keystone correction completely unnecessary.
Keystone and lens shift therefore have different tasks: keystone corrects the trapezoidal distortion caused by angled projection, lens shift gives you installation freedom in the mounting height. The decisive difference: keystone sacrifices picture quality, lens shift does not.
Good to know: Whether a projector offers only vertical or also horizontal keystone correction varies even within the same price range. The Acer H6542, for example, only corrects vertically, while the Optoma HZ41 in the same entry-level class also corrects horizontally. It is worth checking the data sheet before relying on sideways correction.
Quick check: is keystone enough for my setup?
Not every setup situation needs lens shift. The following table shows when keystone is sufficient and when an optical solution is worthwhile.
| Situation | Is keystone enough? | Recommendation |
|---|---|---|
| Mobile / presentation – projector on the table, quick start | Yes | Keystone up to 10° is perfectly fine. Auto keystone saves time. |
| Living room, occasional use – projector on a shelf, slightly angled | Usually yes | As long as the angle stays below 10° and the room is not completely dark (halo less visible). |
| Dedicated home cinema – fixed mounting, 4K projector | It depends | A fixed-offset projector dictates its mounting position depending on the desired image position – if the ceiling mount is in the right place, it sits straight and keystone is unnecessary. Lens shift offers more leeway if, for example, a ceiling lamp or beam blocks the optimal mounting position. |
| Gaming setup – low input lag is crucial | No | Keystone increases input lag. Game mode usually switches keystone off. |
| Fixed installation / conference room – professional continuous operation | Possible | The halo is barely noticeable in bright rooms. The loss of resolution remains, but can be minimised with small correction angles. Lens shift offers more convenience here. |
For the scenarios in which lens shift is the better choice: further down in the article you will find out what it costs and from which price class it is available.
Five side effects of digital keystone correction
The keystone button makes the image straight – but it changes more than is visible at first glance. Five effects that are not in any data sheet:
1. Halo (ghost frame)
The edge pixels switched off by the correction are not really dark. The light source continues to illuminate the entire panel, and the residual light seeps through as a light grey trapezoidal frame around the active image – more strongly on LCD projectors than on DLP. In a darkened home cinema, this halo is clearly visible and spoils the black level.
Not to be confused with: On DLP projectors with XPR pixel shift (4K display), there is a similar-looking halo, but it has a completely different cause – it is created by the DMD hardware and also occurs without keystone. If you see both at the same time, you have two different causes to distinguish.
2. Uneven focus
If the projector is at an angle, the distances from the lens to the top and bottom edges of the image differ. However, the lens can only focus on one plane. Result: centre sharp, edges physically blurred – and no software in the world can correct that. With long-throw projectors at a distance of 3–5 m and correction below 10°, the effect is barely noticeable thanks to the lens’s depth of field. With 4K projectors or short-throw models, it becomes visible much sooner – an effect that regularly stands out at demonstrations.
3. Loss of brightness
The light source always illuminates the entire panel – whether keystone is active or not. The image itself does not get darker, but the pixels switched off by the correction still receive light, which is wasted. At 20° correction, that is around 25–35 % of the pixel area – and therefore its share of the light. If you want to make full use of your projector’s light output, set it up straight or choose a model with lens shift.
4. Image artefacts
Depending on the projector’s resampling method, aliasing staircases appear on diagonal edges, moiré effects on fine patterns (pinstripes, skin textures) and edge flicker during fast camera pans. Inexpensive projectors calculate with simple algorithms and show more artefacts than models with high-quality image processing.
5. Higher input lag
Keystone correction is an additional processing step in the display pipeline: incoming signal, scaler, geometry engine, panel driver. Each additional stage costs response time. Irrelevant for films, noticeable for competitive gaming – more on this under Gaming and keystone.
When do these effects matter – and when not? In a bright living room with occasional use and less than 10° correction, most side effects are barely noticeable. In a dedicated home cinema with a darkened room, 4K resolution or when gaming, they become clearly noticeable.
How much resolution does keystone correction cost?
The qualitative description in the previous section can also be expressed in figures. The following table shows the typical loss of resolution by correction angle – measured by the effectively used pixel area:
| Correction angle | Effective resolution (from 1080p) | Pixel loss (area) | Perception |
|---|---|---|---|
| 0° (no correction) | 1,920 x 1,080 | 0 % | Full sharpness |
| up to 10° | approx. 1,730 x 970 | approx. 10–15 % | Barely visible with films |
| approx. 15° | approx. 1,540 x 860 | approx. 20 % | Slight blurring of text and fine details |
| approx. 20° | approx. 1,500 x 840 | approx. 25–35 % | Clear blurring, aliasing on text and graphics |
| over 25° (extreme) | down to approx. 960 x 540 | up to 75 % | Image looks mushy – 1080p effectively becomes 540p |
The practical limit is below 10°. Up to that point, the loss remains acceptable for film playback. Beyond that, the difference in quality compared with the uncorrected image becomes visible – first with text and graphics, then also in film scenes with fine structures.
4K makes the effect worse: With a 4K projector (3,840 x 2,160), the absolute pixel counts are higher, but the human eye also expects the corresponding level of detail. 20° of keystone at 4K feels worse than 20° at 1080p, because the gap between expectation and reality is greater.
Specific models for orientation: The Acer H6542 – a typical Full HD entry-level projector – offers keystone correction with 4-point geometry, but with one limitation: zoom and geometric correction are mutually exclusive. If you use the zoom for image size, you have to set the projector up physically straight. In the mid-range, models such as the Epson EH-TW7100 (lamp, 3LCD) offer ±30° keystone in both directions plus generous lens shift – the digital correction only serves as fine-tuning there. If you want LED or laser: the BenQ W4100i (LED, 4K DLP) combines keystone with asynchronous lens shift, and the Epson EH-LS12000B (laser, 3LCD), as a reference-class model, offers one of the largest shift ranges on the market.
Practical tips: minimising keystone losses
If you depend on keystone, a few simple measures can significantly reduce the loss of quality:
1. Set up physically straight – first choice.
Every degree you correct mechanically (tilting the projector, adjusting the shelf, putting books underneath) saves digital correction. Zero degrees of keystone is always better than one.
2. Keep the correction angle below 10°.
The resolution table above shows: up to 10° the loss is moderate. From 15° at the latest it becomes visible. If your setup requires more than 10°, the projector is in the wrong place.
3. Manual instead of auto keystone.
Automatic keystone correction (via camera or ToF sensor) is convenient, but depending on the manufacturer it may work with conservative safety margins. Specifically: on models with optical zoom, the automatic function zooms out a little further than necessary to create more leeway for digital correction – with the familiar consequences: a wider halo and more lost pixels. If you want to minimise the halo, readjust manually after the auto setup and reduce the correction until the frame just disappears.
4. Use a test pattern with a grid.
A simple chessboard pattern or an Excel spreadsheet immediately shows how much the correction changes the pixel geometry. Visible staircase effects on diagonal lines? Then the correction angle is too high or the projector’s resampling method is too basic.
5. With 4K: be particularly strict.
What is still tolerable at 1080p is immediately noticeable at 4K – the higher pixel density makes every blur and every artefact more visible. If you buy a 4K projector and then use 15° of keystone, you are throwing away a large part of the resolution advantage.
6. Dark room: a fixed-frame screen hides the halo.
In a darkened home cinema, the keystone halo is most visible. A fixed-frame screen with a black frame hides the halo visually, because the grey residual light area falls on the black frame instead of on the white wall.
7. Choose vertical and horizontal angles deliberately.
Many projectors correct more strongly vertically than horizontally (or only offer vertical keystone). If you can influence the setup angle, choose the axis on which your projector has the larger correction range.
Gaming and keystone
If you use your projector for gaming, you should avoid keystone correction. The reason: the geometry engine in the display pipeline needs processing time. With every frame, millions of pixels are channelled through an additional mathematical stage – this typically costs 1–3 frames of additional input lag (at 60 Hz that is 16–50 ms, at 120 Hz 8–25 ms).
On classic projectors, game mode therefore automatically switches off keystone correction or severely restricts it – game mode prioritises minimal latency and bypasses all downstream image processing steps.
A positive exception: Dedicated gaming projectors of the newer generation solve the issue in hardware. The BenQ X3100i, for example, keeps 2D keystone correction active even in Fast Mode while achieving an input lag of only approx. 4 ms at 240 Hz. Its image processor recalculates the geometry so quickly that the lag penalty practically disappears. ViewSonic follows similar approaches with its “Designed for Xbox” models and XGIMI with the Horizon series – although with higher latencies.
The cleanest solution for gaming nevertheless remains: set the projector up physically straight or choose a model with lens shift. Keystone – even with a fast processor – always costs resolution. Gaming projectors with lens shift deliver the full pixel count with minimal latency, without compromises in positioning.
4-point correction and geometry warping
In addition to classic keystone correction (which only compresses the image top/bottom and left/right), many projectors offer 4-point geometry correction: each corner of the image can be moved individually. This allows adjustment to uneven projection surfaces, slanted walls or irregular setup geometries.
The loss of resolution with 4-point correction tends to be higher than with pure keystone correction, because more pixels are recalculated in more complex directions. The function is a tool for special situations – not for everyday use.
For professional installations there are also 9-, 15- and 25-point warping levels, which are used on professional projectors for edge blending (seamless multi-projector panoramic images) or curved screen setups. That is a topic of its own, beyond the scope of this guide.
Lens shift: the optical alternative to keystone correction
If keystone bends the image straight digitally and sacrifices pixels in the process, the question arises: can it be done without losses? Yes – with lens shift. The lens sits on an internal carriage and is moved mechanically in front of the display. The projected image moves up, down or to the side on the screen without the software touching a single pixel. Resolution, brightness, sharpness and geometry are 100 % preserved.
Who is lens shift interesting for?
- Newcomers: If you are planning your first projector and know that it will be permanently mounted (ceiling, shelf, wall mount), lens shift is worth it as an investment in stress-free setup. Once adjusted, the image sits perfectly for good.
- Existing owners: If you notice the keystone side effects on your current projector – halo in a dark room, blurred corners, gaming lag – lens shift is the solution for your next upgrade.
What does lens shift cost?
| Price class | Typical features |
|---|---|
| Under €1,000 | Usually no lens shift (keystone only) |
| From approx. €1,500 | Often vertical lens shift |
| From approx. €2,500 | Convenient 2-axis shift (vertical + horizontal), often motorised |
| From approx. €4,500 | Native 4K LCoS or 3LCD with a large shift range (±80 % vertical and more). However, 3LCD models do not achieve native 4K. |
From the mid-range upwards, lens shift is no longer a luxury feature but often a standard feature that makes setup noticeably easier – without compromising picture quality. Epson models from the home cinema series in particular stand out with generous shift ranges that cover even demanding installations. The price thresholds are guidelines – individual models such as the LG HU710PB also offer lens shift outside the typical price class. If in doubt, our personal advice will help you choose.
Detailed guide with model examples, how to read data sheets and setup scenarios: Lens shift and offset on projectors.
Frequently asked questions (FAQ)
Does my projector lose resolution through keystone?
Yes. Digital keystone correction compresses the image and switches off edge pixels. At 10° correction the loss is 10–15 %, at 20° already 25–35 %. The resolution table further up shows the complete scale.
What is the grey frame around my image?
Two causes need to be distinguished here: many projectors – especially DLP models – show a narrow native halo that is always present due to the technology. The black masking of a good screen reliably hides it. Keystone correction additionally creates a much wider trapezoidal frame of residual light, which extends beyond the masking as the correction angle increases. With slight correction it still falls within the frame; with stronger correction it becomes visible on the wall – and is particularly noticeable in darkened rooms. If you want to avoid the keystone halo completely, set the projector up straight or choose a model with lens shift.
Does keystone interfere with gaming?
On most projectors, yes – the geometry calculation noticeably increases input lag, which is why game mode often switches keystone off. Newer gaming projectors (e.g. the BenQ X3100i) can keep keystone active even in Fast Mode, but only achieve the lowest latencies with physically correct positioning or lens shift. Recommendation: set the projector up straight or choose a gaming projector with lens shift.
What is the difference between keystone and trapezoid correction?
There is no difference – they are two names for the same function. Keystone and trapezoid correction both refer to the digital rectification of a distorted, trapezoidal image. Both terms appear in data sheets, sometimes also the abbreviation V-Keystone (vertical only) or H/V-Keystone (vertical and horizontal).
Up to what angle is keystone acceptable?
As a rule of thumb: stay below 10°. Up to that point, the loss of quality is barely visible with normal film playback. At 15°, details such as text and fine structures become noticeably softer. From 20° the loss is clear even with films – a 1080p projector then effectively only delivers 800p or less.
Can I use keystone and lens shift at the same time?
Technically yes, most projectors with lens shift allow it. In practice, however, it is rarely necessary: if lens shift already covers the image offset, there is no reason to activate keystone as well and sacrifice pixels. The combination only makes sense if the lens shift range is not quite enough and the last 2–3° are corrected digitally – in that case it is worth checking the mounting position again.
Advice and suitable projectors in the shop
Keystone correction is a practical tool for mobile and occasional use. For fixed installations – whether home cinema, gaming setup or conference room – lens shift is the solution that permanently keeps picture quality at the level you paid for.
Which projector suits your setup situation can be clarified more quickly in a short consultation than in hours of data sheet research. We have the data on all models in our range and help you find the right overall solution – from the projector and the right screen to cables and mount.
Matching product categories in the shop:
- Home cinema projectors – many models from the mid-range upwards with lens shift
- Gaming projectors – low input lag, lens shift for clean positioning
- Mini projectors – compact with auto keystone for on the go
- Installation projectors – lens shift essential, professional geometry correction
Further guides:
- Lens shift and offset on projectors – detailed guide with model examples
- Projector ceiling mounting – positioning, cables, mounts
- Projector adviser – overview of all guides
