
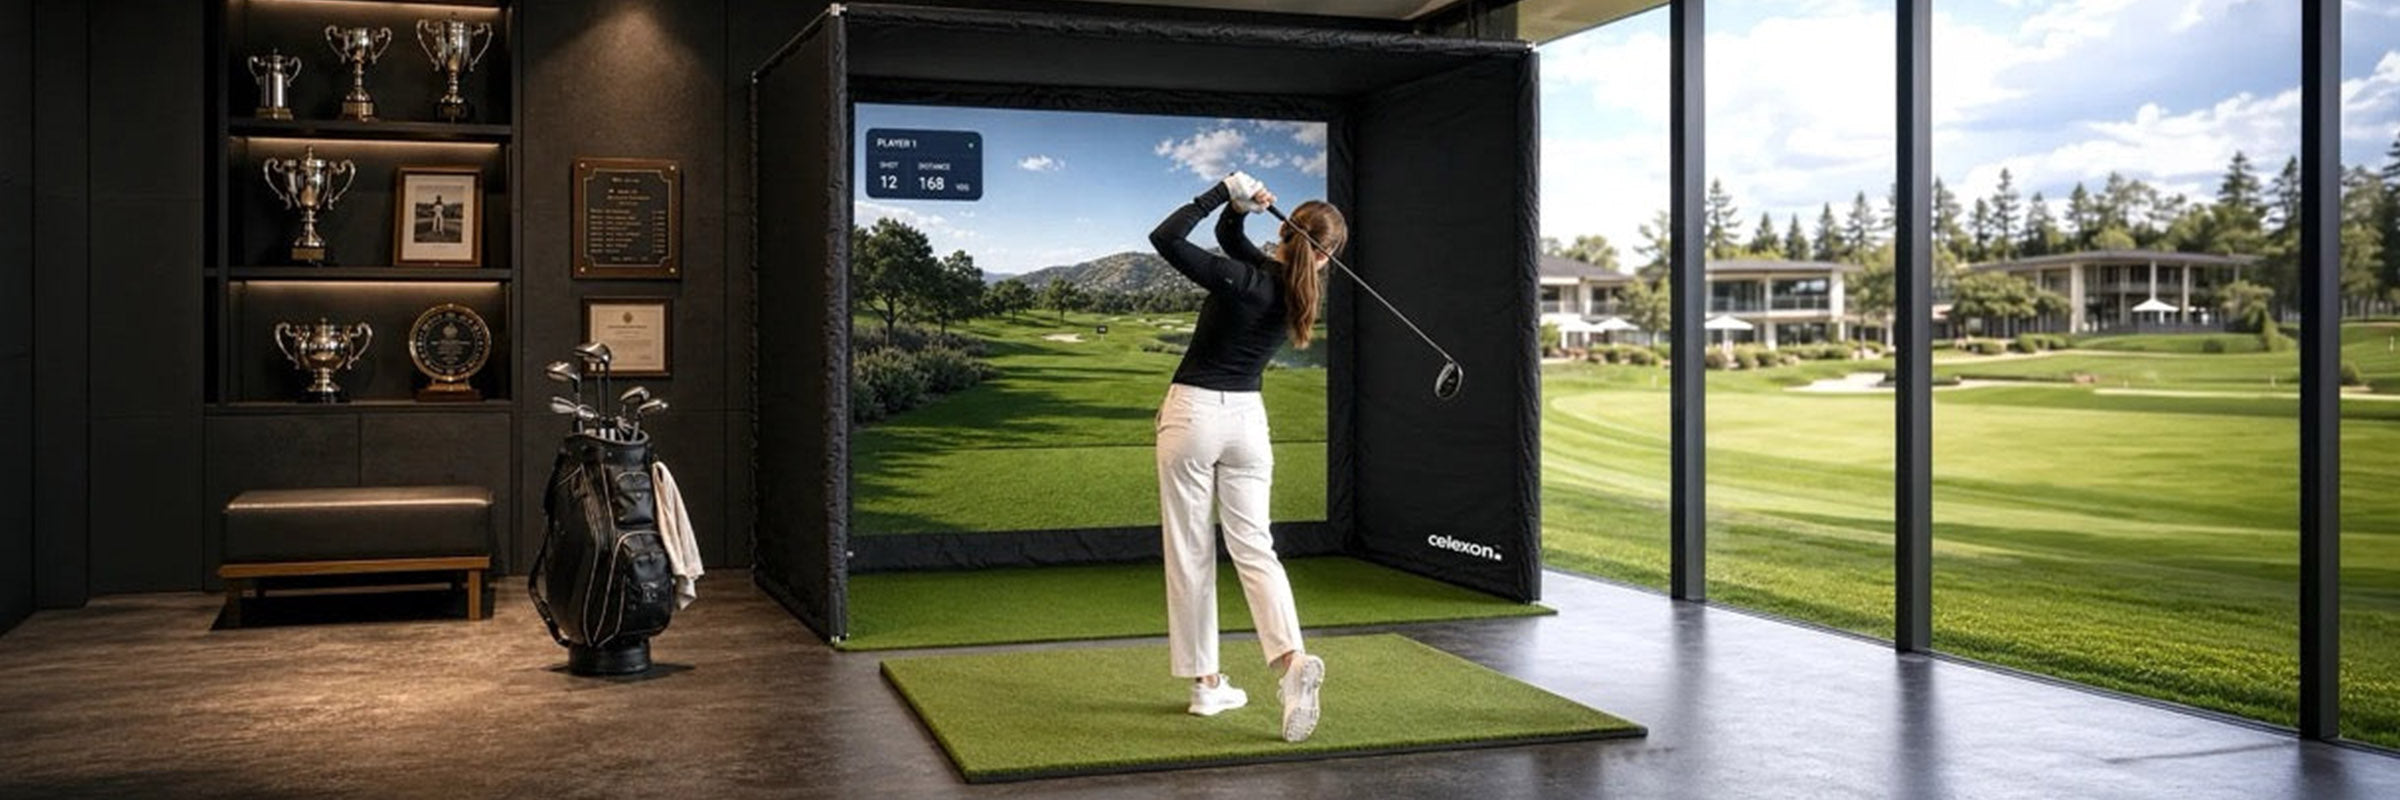
A golf simulator box is the mechanical foundation of your indoor golf set-up: it stays in place for years, shapes the feel of play and safety, and determines how the projector, launch monitor and software fit into the set-up.
In this guide we show which box size suits which room, what to look for in the impact screen and how projector, launch monitor and room dimensions relate to each other. Private customers and operators of indoor golf facilities each get concrete recommendations for planning and installation.
In brief
- Measure the room first: for comfortable play, 4.5–5.5 m depth, 3–4.5 m width and a ceiling height of 2.7 m+ are ideal.
- Choose the box to suit the playing position: with 1.5 m boxes, the player stands in the room in front of the box (a pure screen and catch zone). With 3 m boxes, you play into the cabin – tee and ball are inside the box and the player stands at the rear edge of the box; this is particularly suitable for tidy set-ups with a camera-based or ceiling-mounted launch monitor.
- Do not underestimate the impact screen: multi-layer premium screens reduce rebound energy, noise and wear – and thus also protect the projector and launch monitor.
- Plan the projector and launch monitor at the same time: box size, throw ratio and measuring system must match.
- The hardware remains flexible: box, projector, launch monitor and software can be freely combined – you are not tied to one ecosystem and can upgrade individual components later.
Which FAIRWAY box suits which room?
If you already know you want a celexon FAIRWAY Professional, here is the quick answer:
| Room type | Approx. room size | Recommendation | Why |
|---|---|---|---|
| Basement / garage, limited depth | from approx. 4.5 m, more comfortable 5.1–5.7 m | 2.6 × 2.5 × 1.5 m or 3.0 × 2.5 × 1.5 m | Playing area in front of the box, compact set-up |
| Comfortable home room, ceiling camera wanted | from approx. 4.2 m depth and 3.0 m height | 3.0 × 3.0 × 3.0 m | play into the cabin, right- and left-handed play without rearranging |
| Switching between right- and left-handers without moving anything | from 3.6–4.0 m width | 3.6 × 2.5 × 1.5 m or 4.0 × 2.5 × 1.5 m | wide image area, both swing directions without moving the mat |
| Commercial bay / indoor golf facility | External box dimensions 4.0 × 3.0 × 3.0 m; allow additional buffer and technical space depending on the launch monitor type | 4.0 × 3.0 × 3.0 m | Showroom look, ceiling camera set-up, continuous commercial operation |
Note on room depths: the second column above gives rough minimum values. The room depth that actually makes sense also depends on the buffer zone behind the screen, the standing area behind the tee and the type of launch monitor. Radar-based systems behind the player need considerably more room depth than camera-based or ceiling systems. The exact breakdown follows further down in the minimum dimensions + the box format logic.
Want your measurements checked in advance? Send us the room depth, room width, ceiling height and planned launch monitor type – we will check which FAIRWAY version and which projector class suit your room. Contact details at the end of this guide.
Already know your room dimensions? Jump straight to the FAIRWAY size overview. If you are still planning, read on below – minimum dimensions, set-up steps and typical pitfalls.
Contents
- Minimum dimensions and room planning
- Buying a golf simulator box: what to look for?
- Five steps to a playable set-up
- Impact screen, gain and fire protection in detail
- Choosing the right projector for your golf simulator
- Ceiling mount, placement and avoiding shadows
- Cable management: HDMI distances, extenders and typical pitfalls
- Keeping lighting and stray light under control
- Launch monitor and software ecosystem
- Acoustics and soundproofing
- Indoor golf facility: what FAIRWAY solves on the hardware side
- Common beginner mistakes during set-up
- Frequently asked questions
- Conclusion and recommendation
Minimum dimensions and room planning – which box suits which room?
Choosing the box is the most important long-term decision in the set-up. The frame stays in place for years, can hardly be changed afterwards and defines which types of club you can sensibly practise with, whether left- and right-handers can switch without rearranging and which projector lens is even an option. So the room comes first, then the box – not the other way round.
Terms in plain English: different suppliers use different terms – golf simulator box, golf simulator enclosure, golf cabin, indoor golf enclosure or golf simulator housing. They usually mean the same thing: an enclosure made up of a frame, impact screen and side panels into which the ball is hit. In indoor golf vocabulary, a "bay" is a single simulator playing position; a facility with four playing positions is a "4-bay facility".
Minimum dimensions at a glance
| Dimension | Private minimum | Private optimum | Indoor golf facility / commercial |
|---|---|---|---|
| Ceiling height | 2.4 – 2.6 m | 2.7 – 3.2 m | ≥ 3.0 m (suitable for driver) |
| Room width (one hitting side only) | 3.0 – 3.6 m | 3.6 – 4.0 m | ≥ 4.0 m |
| Room width (mixed right- + left-handers) | 4.5 m | 4.5 – 5.0 m | ≥ 4.5 m |
| Room depth | 4.0 m | 4.5 – 5.5 m | ≥ 5.5 m for ceiling camera set-ups |
| Buffer zone behind the screen | 0.3 – 0.4 m | 0.4 m | 0.4 m + memory foam if required |
Rule of thumb: Ceilings below 2.4 m turn driver shots into an ordeal, depending on body height and swing – the club comes close to the ceiling at the top of the backswing and the player unconsciously changes their movement. For many players, 2.7 m makes sense as a lower limit if you want to practise with a driver in the long term.
Where the player stands depends on the box format
An important distinction that many first-time buyers overlook: whether the player stands in front of the box or plays into the cabin – and that depends on the box format.
| Box depth | Playing position | Total room depth (required) |
|---|---|---|
| 1.5 m (four smaller versions) | Player stands in the room in front of the box; the box is purely a screen and catch zone | ≥ 4.5 m (box + playing area + stance) |
| 3.0 m (two larger versions) | Tee and ball are inside the cabin; the player stands at the rear edge of the box or a little behind it | ~4.1–4.2 m with a camera-based or ceiling-mounted launch monitor |
Important regarding the launch monitor: the ~4.1–4.2 m applies to camera-based or ceiling systems. A radar-based system behind the player needs an additional 2–3 m behind the tee (details in the launch monitor section) – in that case the larger room depth still applies even with a 3 m box.
The box width is crucial for lateral swing room (hooks, slices, drivers with a wide swing) and for switching between right- and left-handers without moving the hitting mat (comfortable from 4 m image width).
Rule of thumb for choosing the box format
The 1.5 m deep versions work as a screen and catch zone; the player stands in front of the box. With the 3 m deep versions, you play into the cabin – tee and ball are inside the box and the player stands at the rear edge of the box; this is particularly suitable for tidy set-ups with a camera-based or ceiling-mounted launch monitor. The width determines how comfortably right- and left-handers can switch – from 3.6 m image width without moving the hitting mat.
All six size details (dimensions, weight, visible projection area, recommendation per version) can be found in the version overview on the FAIRWAY product page.
Buying a golf simulator box: what to look for?
When buying a golf simulator box, five points count: dimensions that suit the room, a multi-layer impact screen with good energy absorption, a sturdy tubular frame with foam padding (stainless steel in the premium class), safe side panels to guard against mishits, and compatibility with all common projector and launch monitor concepts. Premium qualities only become apparent over months – shape, tension, sound damping and controlled ball behaviour hold up where entry-level screens deteriorate. Details on the five points in the following sections.
Don't forget: the box is the mechanical foundation. For a complete simulator set-up you also need a projector, launch monitor, software, source device/PC, ceiling mount, cabling and possibly acoustic or floor mats.
Five steps to a playable set-up
If you are starting from scratch, go through the steps in exactly this order – the order determines whether you end up with a well-matched set-up or have to rearrange components afterwards.
Step 1 – measure the room and assess it honestly
Do not just measure length × width × height, but also:
- Obstacles: lights, radiators, support pillars, windows, door thresholds – anything that protrudes into the swing radius.
- Floor: load-bearing capacity, evenness, sealing. An indoor golf hitting box weighing 80–120 kg is structurally uncritical, but playing in it is not – the floor mats need a flat, ideally hard base, otherwise they give unevenly.
- Wall behind the planned screen: solid wall or drywall? With drywall, it is better to plan an additional layer of memory foam.
- Ventilation / humidity: indoor golf generates heat and sweat. Rooms without passive ventilation need a fan or air-conditioning unit – otherwise players and hardware suffer.
B2B note: if you are planning a commercial indoor golf facility, we can help with the hardware concept (box, projector, launch monitor, mount, acoustics) – details in the section Indoor golf facility: hardware concept.
Step 2 – choose the box size
Take the measurements from step 1 to the decision matrix above. If you are torn between two sizes, choose the larger one if in doubt – the box will stay in place for years, and saving 40 cm of depth will come back to bite you with the first wayward driver swing.
Step 3 – choose the projector
The projector is the most important component in everyday use – poor picture quality is noticeable with every shot. The selection logic (throw type, lumen class, laser vs. lamp) can be found in the projector selection section further down. Important in this step: projector and box must match – throw type to room depth, image width to screen format. If you choose the box without considering the projector, you may end up buying twice in the worst case.
Step 4 – launch monitor and software
The heart of the measuring system. Three designs (details in section 8):
- Radar-based behind the player – needs 2–3 m of room depth behind the tee, compatible with almost all software platforms
- Camera-based to the side of the ball – compact, but has to be moved when switching hitting side
- Fixed ceiling camera – cable-free floor, playable for both right- and left-handers, highest investment
The choice of software is usually tied to the launch monitor, not to the box or projector – you remain flexible here and can switch later.
Step 5 – commissioning
Assemble the box, set up the projector, calibrate the launch monitor, configure the software. Allow around 90 minutes per person plus a test round. If you start hitting balls straight away in the first session, you often overlook a box that is not level, the projector's lens offset or a screen that is tensioned too tightly (see beginner mistakes).
Impact screen, gain and fire protection in detail
The biggest difference in quality between a golf simulator box fit for everyday use and a set-up that "sort of works" lies in the impact screen. Three classes are found on the market:
| Screen class | Construction | Picture quality | Durability | Noise damping |
|---|---|---|---|---|
| Standard (entry level) | single-layer polyester fabric | grainy image, sags over time | limited, unsuitable for continuous use | minimal |
| Mid-range | double-layer, partly silicone-coated | usable contrast | sufficient for home use | moderate |
| Premium | multi-layer with damping core, B1 fire rating | uniform, high contrast, 4K-capable | for demanding private use and continuous commercial use | noticeably reduced impact noise |
How can you recognise a premium impact screen? Multi-layer construction, good energy absorption, a uniform projection surface, suitable gain values and – for commercial use – reliable proof of fire protection. According to the manufacturer, the celexon FAIRWAY Professional line meets these criteria; the difference from standard screens shows not with the first shot, but with the hundredth.
Why does a premium screen also protect the projector?
A point that gets lost in most set-up comparisons: the multi-layer impact screen also protects your hardware. If you have invested in a premium projector, a ceiling-mounted launch monitor and a suitable software licence, you have expensive hardware hanging right in the danger zone. With a single-layer standard screen, the ball bounces back with considerable residual energy – a wayward driver or a mishit can become a missile heading for the projector lens or the launch monitor camera. A multi-layer construction such as the FAIRWAY screen absorbs the impact energy so that the ball drops to the ground in a controlled way in front of the screen instead of shooting back. Protection for your investment in the projector and launch monitor included.
What does the gain tell you about the screen?
Gain describes how strongly the screen reflects the projector's light towards the player. Values:
- 0.7–0.8: highly diffusing, very wide viewing angle, low risk of hotspots, but subdued brightness
- 0.9–1.0 (FAIRWAY class): a balanced ratio of brightness, contrast and hotspot tolerance – the premium specification for golf simulator screens that has become established on the market
- 1.1 and higher: highly directional, very bright-looking images, but sensitive to off-axis seating positions and a projector that is not level
Fire protection and material compliance
In private practice rooms, B1 fire protection is a nice-to-have; in commercial indoor golf facilities, showrooms and clubhouses it is often required (by insurers, landlords or licensing authorities – check for your location). If you want to use a facility commercially later on, plan B1 from the outset instead of having to retrofit it. In addition, according to the manufacturer, the FAIRWAY turf matrix is free of phthalates, polycyclic aromatic hydrocarbons (PAHs) and heavy metals – relevant if landlords or insurers require proof of materials.
Choosing the right projector for your golf simulator
This section gives you the selection logic. We will be happy to advise you directly on choosing a specific model – the right box version, room depth and lumen requirement together determine which projector belongs in your set-up.
Three rules of thumb
1. The throw type determines the placement
- Ultra short throw (TR < 0.4): for very tight rooms; the projector stands directly in front of the screen – needs its own protection from stray balls because it is positioned in the swing/catch area
- Short throw (TR 0.4–1.0): the most versatile choice for home simulators; the projector hangs just in front of or above the player
- Standard (TR > 1.0): needs room depth; makes sense with large 3 × 3 m+ boxes with rear wall mounting
- Long throw (TR typically > 1.8): large rooms and showrooms with daylight and high brightness requirements
2. Lumen class according to room light
- 2,500–3,500 lumens: completely darkened hobby basement, garage without daylight
- 3,500–5,000 lumens: typical home practice room with some ambient light – the optimum for 80 % of set-ups
- > 5,000 lumens: open commercial spaces, indoor golf facilities with a glass frontage, showrooms with daylight
3. Match the resolution to the image width
- Full HD and WUXGA (1,920 × 1,080 and 1,920 × 1,200 respectively) still deliver good images with smaller image widths and a limited budget – but in an indoor golf set-up the player stands relatively close to the screen, where the pixel structure becomes visible sooner than in a classic home cinema.
- 4K UHD is the visibly better choice for larger image widths and demanding green rendering: turf textures, menus and impact replays look finer. The extra cost goes straight into your everyday experience.
Laser or lamp?
For permanent golf simulator set-ups, laser projectors are usually the better choice today: 20,000 hours of life without lamp changes, full brightness immediately after switching on, a more consistent picture over the service life (laser light sources fade more slowly than lamps). Lamp models can still work for very budget-oriented home set-ups with occasional use, but are less convenient in the long term because of lamp changes, warm-up time and gradual loss of brightness. For a commercial indoor golf facility with several operating hours a day, the arguments for laser clearly prevail.
Dedicated simulation projector or standard projector?
In many home set-ups, a good short-throw laser projector with 4,000–5,000 lumens is perfectly sufficient. Dedicated golf simulation projectors (e.g. with interchangeable lenses and a colour engine optimised for turf/green rendering) offer more installation flexibility and detail sharpness – the extra cost pays off for commercial facilities or demanding private set-ups that go all-in on golf.
Four suitable projectors from our range compared
Which projector suits which box format depends on room depth, brightness and your expectations. Four models from our range cover the typical golf sim scenarios – from a short-throw home set-up to a dedicated simulation projector:
| BenQ Aurora BR9708 | Optoma ZK608TST | Panasonic PT-VMZ51S | BenQ TK710STi | |
|---|---|---|---|---|
| Brightness | 2,600 ANSI lumens | 6,000 ANSI lumens | 5,200 ISO lumens | 3,200 ANSI lumens |
| Resolution | 4K UHD (3,840 × 2,160) | 4K UHD (3,840 × 2,160) | WUXGA (1,920 × 1,200) | 4K UHD (3,840 × 2,160) |
| Light source | Laser, 20,000 h | Laser, 30,000 h | Laser, 20,000 h | Laser, 20,000 h |
| TR | 0.5–1.6:1 (interchangeable lenses) | 0.58:1 (fixed) | 1.09–1.77:1 | 0.69–0.83:1 |
| Lens shift | V ±50 % · H ±15 % | V/H fine adjustment | V +44 % · H ±20 % | – |
| HDR | HDR10 · HDR10+ · HLG | HLG | – | HDR10 · HLG |
| HDBaseT | – | ✓ | – | – |
| Golf mode | RGBRGB colour wheel | – | – | – |
| Network / control | LAN · RS-232 · 3D Sync | LAN · Wi-Fi · RS-232 | LAN · PJLink · RS-232 | LAN · Wi-Fi · RS-232 · Android TV |
| Recommendation | Dedicated simulation projector – golf set-up with maximum picture and installation flexibility | Very bright short-throw laser for light-flooded rooms – 30,000 h life, HDBaseT for long cable runs | 3LCD imaging with simultaneous colour reproduction, a robust pro AV workhorse for indoor golf facilities | Private practice room with limited room depth, 4K replay sharpness wanted |
The BenQ TK710STi (TR 0.69–0.83:1) covers the smaller FAIRWAY versions from 2.6 m image width with a comfortable short-throw installation – typical for living rooms, garages, hobby basements or club rooms with a ceiling lift. The Panasonic PT-VMZ51S sits in between with standard throw and high brightness – the pro AV workhorse for mixed lighting conditions. The Optoma ZK608TST is the brightest short-throw candidate in the comparison (6,000 ANSI lumens, 30,000 h laser, HDBaseT) – the recommendation for showrooms, indoor golf facilities with daylight and continuous commercial operation. If you are going all-in on a golf set-up, you will end up with the Aurora BR9708 as a dedicated simulation projector. Although it is only rated at 2,600 ANSI lumens, its RGBRGB colour wheel (6 segments without a white segment) gives it much more vivid colour reproduction – greens, bunker sand and fairway textures look richer and more realistic than on brighter projectors with an RGBW colour wheel.
Ceiling mount, placement and avoiding shadows
Ceiling mounting is standard
In almost every indoor golf set-up, the projector hangs from the ceiling. Three reasons:
- No shadows: the projector is outside the swing line. A player standing or moving does not cast a shadow on the screen.
- Projector safety: wayward drives and shanks do not hit the lens. Floor installations with the projector close to the swing are an avoidable risk.
- Cable management: the ceiling is the natural route for projector power cables and HDMI anyway – floor set-ups run cables across the playing area, which creates a trip hazard.
Correct height and position
- Height: the projector typically hangs 0.8–1.2 m below the ceiling, depending on lens shift and throw type. Important: the cone of light must not catch on the upper crossbar of the box – otherwise the top of the image will be cut off.
- Position relative to the player: directly above the ball or slightly in front of it, not too far behind the player. Projectors more than 0.5 m behind the centre of the swing cast the player's shadow on the screen.
Geometry before digital correction – lens offset, lens shift, keystone
Before ceiling mounting, the length of the mount and the lens offset of the projector model determine where the image lands. Vertical lens shift extends the leeway optically; digital keystone correction should be avoided. If you overlook this, you will make one of the most common beginner mistakes – details below in beginner mistake #4. More in-depth background in our lens shift guide – if anything about your specific installation is unclear, we will advise you directly.
What if ceiling mounting is structurally impossible?
If ceiling mounting is structurally impossible – e.g. suspended ceilings, rented premises without permission to drill – an ultra short throw projector is used that stands just in front of the screen. The player then stands behind the projector (outside swing range!), which works well with boxes from 3 m deep.
Cable management: HDMI distances, extenders and typical pitfalls
Passive HDMI is usually not enough – what works instead
The distance between the PC or launch monitor and the ceiling-mounted projector is 4.5–7.5 m in most set-ups. Passive copper HDMI cables quickly become a source of errors here – symptoms are "picture dropouts every 30 seconds" or "flickering snow", which makes the simulation unplayable. The right solutions depending on resolution and distance:
- Full HD: active HDMI cable with built-in signal booster – the simplest solution for runs of up to around 15 m. Specific models in our HDMI cable category.
- 4K UHD: optical HDMI cable (fibre-optic HDMI) – at 4K resolution, copper becomes unreliable from approx. 7.5 m. Optical HDMI cables transmit the signal losslessly well beyond 30 m.
- HDBaseT via Cat 6a network cable – the professional solution for long runs of up to 100 m. Particularly practical if the projector already has an HDBaseT or DIGITAL LINK input; then only a suitable transmitter is needed at the source device.
Cable routing through the box poles
The tubular frame of the box is the natural "cable motorway": HDMI and power cables are fixed to the frame every 30–45 cm with reusable hook-and-loop cable ties. Conventional single-use plastic cable ties are unsuitable here, as they cannot be released without cutting – making cable replacement, re-routing or a projector change unnecessarily complicated. Hook-and-loop cable ties can be opened and refitted without damaging the set-up.
Floor cables: never through the playing area
USB cables from a floor-standing launch monitor to the PC should not run across the hitting mat – that is an avoidable trip and damage hazard. Instead:
- routing along the wall or skirting board with paintable PVC cable trunking
- with a thick foam underlay mat: cut a narrow groove into it and lay the cable in it (invisible and safe)
Typical beginner mistakes in cable management
- Play first, tidy up later: if you leave the cable chaos to tidy up "later" in the excitement of commissioning, you never will. Always plan the routing as part of the set-up step.
- Not labelling cable ends: With six identical HDMI cables in the set-up, troubleshooting picture dropouts becomes a test of patience. Labelling tape on both ends takes 30 seconds and saves hours later.
- Never cut holes in the screen: it sounds absurd – but it happens regularly when a cable is supposed to be routed "through the screen". The screen immediately loses its impact properties and tears with the next few hits.
Keeping lighting and stray light under control
What works
- Dimmable lights: indirect ceiling spots or wall washers, dimmable from full brightness (putting set-up, playing together) to darkened (replay sharpness)
- Diffuse, soft light: no spotlights that shine directly onto the screen
- Blackout curtains at windows, ideally made of blackout fabric
What ruins the picture
- Windows directly behind the player or to the side of the screen: light hits the screen at an angle and washes out the image
- Direct light sources above the screen: spotlights or pendant lights in the line of sight to the screen create reflections
- Bright walls behind the screen without a back cover: the screen is not completely opaque – if there is a window or a very bright wall behind it, the residual light bleeds through and reduces contrast
Back cover behind the screen
In commercial set-ups and in rooms with a window or bright wall behind the box, a light-blocking back cover is highly recommended: a black, dense fabric mounted behind the impact screen. It absorbs residual light from behind and increases the effective contrast.
Launch monitor and software ecosystem
Three designs – three placement logics
Radar-based behind the player (floor placement)
- Devices are placed on the floor 2.0–3.0 m behind the tee
- Require a total room depth of 5.0–6.5 m
- Compatible with almost all software platforms
- Advantage: cheapest way in, playable for right- and left-handers without rearranging
- Disadvantage: the room depth requirement rules out cramped home set-ups
Camera-based to the side of the ball (floor placement)
- The device stands directly next to the ball, often on a tripod at hip height
- Very compact – also works with a room depth of 4 m
- Disadvantage: has to be moved every time you switch between left- and right-handers
- Advantage: high measuring accuracy at impact
Ceiling camera (permanently mounted)
- Premium solution, screwed firmly to the ceiling
- Advantages: cable-free floor, playable for right- and left-handers without moving anything, highest measuring accuracy
- Requirement: ceiling height ≥ 2.7 m, precise mounting height depending on the model (typically 2.8–3.2 m)
- Investment: considerably higher, but the gold standard for commercial indoor golf facilities
Software is tied to the launch monitor
The choice of software follows the launch monitor, not the other way round. Most market-leading devices support several platforms with different focuses – course play, training with swing diagnostics, multiplayer modes. In this guide we have deliberately not included licence price comparisons, as providers' terms change every quarter. We will be happy to advise you directly on your choice.
Wireless instead of cables
Floor-standing launch monitors often communicate with the PC or tablet via Wi-Fi or Bluetooth – this massively reduces cable routing. Make sure you have a stable, low-latency Wi-Fi connection in the playing room (ideally a dedicated access point near the box rather than the home router two rooms away).
Acoustics and soundproofing in blocks of flats and clubhouses
Indoor golf is not quiet. The moment of impact creates a short, dull thud that reaches 65–85 dB(A) depending on the set-up and type of ball – comparable to a fridge door slamming shut or a loud vacuum cleaner.
What reduces the noise level
- Multi-layer impact screen: thanks to its layered construction, it dampens impact noise considerably compared with single-layer screens
- Foam padding on the frame: softly absorbs ball contact with the frame – the high-pitched "slapping" component disappears
- Foam floor or underlay mat: absorbs impact noise and footfall noise, particularly relevant in blocks of flats
- Foam ball or limited-flight ball: a reduction of 10–15 dB(A) compared with a standard ball, often sensible for beginners and practice
What increases the noise level
- Hard, echoey rooms with bare walls and concrete floors
- Standard balls at high club speed (driver with ≥ 150 km/h ball speed)
- Direct contact with neighbours through thin walls or floors
At home
In flats without thick floors between storeys, indoor golf is audible even with a premium box – not intrusively loud, but noticeable. If you want to avoid conflicts with your neighbours:
- limit playing times on weekdays to 9 pm, at weekends to 9 am–8 pm
- use foam or limited-flight balls for the first few weeks until the set-up, hitting area and ball behaviour are properly fine-tuned
- Optional: acoustic panels on the ceiling and walls behind the box
For indoor golf facilities
In commercial facilities with several bays side by side, acoustics become a must – players should not disturb each other and the noise level in the hospitality area should remain acceptable for everyday use. Proven measures:
- Partition walls between bays (acoustically effective, not just visual)
- Acoustic ceiling panels throughout the playing area
- Thick foam floor build-up across the entire floor, not just under the box
- Sound-absorbing curtains or upholstery in the lounge / hospitality area
Indoor golf facility: what FAIRWAY solves on the hardware side
For operators of indoor golf facilities, FAIRWAY is the mechanical foundation of each bay: a stainless steel tubular frame with impact screen, hitting mat, fringe turf and safe enclosure. Business planning (rent, staff, licence costs, utilisation) remains separate and belongs in the hands of your tax adviser or business start-up coach. We provide concrete support with the technical design. What FAIRWAY offers for multi-bay set-ups:
- B1-certified impact screen – can be relevant for commercial insurance, landlord approval or official inspections
- Turf matrix tested for harmful substances according to the manufacturer (free of phthalates, PAHs and heavy metals) – makes material documentation easier for public and commercial spaces
- Tool-free assembly per bay – in multi-bay facilities, each bay is set up by two people in around 60 minutes; relocation or seasonal operation is possible without a dismantling specialist
- Six size formats within one product line – smaller and larger bays can be combined (e.g. two 4 × 2.5 bays for swing practice plus one 4 × 3 × 3 bay as a premium lounge playing position)
- Can be combined with different projector and launch monitor concepts – no ties to a manufacturer on the audiovisual side
Typical multi-bay configurations we supply are 2-bay, 4-bay and 6-bay set-ups – the right box version for each bay depends on the room layout, target group and premium expectations. We will make a recommendation as soon as we have seen your floor plan.
Is your facility in the planning stage? We advise on the technical design (box versions per bay, choice of projector and launch monitor, ceiling and mount set-up, acoustic requirements, fire protection hardware) – not on profitability or software licensing strategy. We will be happy to cover the entire hardware side with our supplier network and installation experience.
Common beginner mistakes during set-up
Five mistakes crop up in most first-time set-ups – knowing them saves time, money and the occasional bruise.
1. Tensioning the screen too tightly
Beginners pull the screen as tight as possible with every available tensioning strap to avoid creases. The consequence: the ball bounces back at high speed – a risk of injury and damage to hardware (details in the impact screen section). The right way: mount the screen with moderate tension so that it can give slightly. Slight creases usually reduce within the first 24 hours as the screen settles.
2. Wrong damping material behind the screen
Between the screen and the wall there should be memory foam or special damping material – a buffer zone that reduces the ball's impact from the screen into the wall. If you use dark removal blankets here: the frictional heat of spinning golf balls (up to 10,000 RPM) burns the dark colour into the white screen, and the damage cannot be repaired. If you use raw memory foam without a protective cover: the foam will be torn to pieces within a few weeks.
3. Projector position casts the player's shadow
The projector hangs too far behind the tee: the swing casts a shadow across the screen – particularly annoying in the replay, because the ball flight becomes invisible from the shadow onwards. Part of the same geometry task as point 4 – plan the projector position completely before drilling.
4. Ceiling-mounting the projector without a geometry check
Symptom: the cone of light hits the box's crossbar at the top, the image sits too high or too low, or it has to be "straightened" with digital keystone correction. The cause is usually that the vertical projector position (mount length + lens offset of the model) was not checked before drilling. Resolution losses from keystone affect turf textures and ball edges most. Details on the geometry in our lens shift guide.
5. Planning the launch monitor only after set-up
If you set up the box, projector and mat without considering the launch monitor's measuring range, you often have to change the mat, PC or projector position later. Radar systems need space behind the player, side-mounted camera systems need space next to the ball, ceiling cameras need an exact mounting height. Include the launch monitor in your room planning before set-up.
Frequently asked questions: room and size
What minimum ceiling height do I need for driver shots?
2.4 m as an absolute minimum, 2.7–3.2 m as the optimum – see the minimum dimensions table in the section Minimum dimensions and room planning.
How much total room depth do I need from the tee to the wall behind the screen?
With a 1.5 m box depth, around 5.1–5.7 m; with a 3 m box depth, around 4.1–4.2 m (you play into the cabin). This applies to camera-based or ceiling-mounted launch monitors; a radar-based system behind the player needs an additional 2–3 m. With limited room depth, the larger boxes are often the better choice, even though they are nominally "deeper".
Can right- and left-handers play in the same set-up without rearranging?
Yes, from 3.6 m image width. With camera-based launch monitors, the measuring device has to be repositioned (a few seconds); with ceiling cameras, even that is not necessary.
Which box size fits in a normal garage?
Double garage (approx. 6 × 6 m, 2.5–2.6 m ceiling height): the 1.5 m deep versions from 2.6 × 2.5 × 1.5 m to 3.6 × 2.5 × 1.5 m. Single garage (3 × 6 m): the smallest version, 2.6 × 2.5 × 1.5 m.
Frequently asked questions: technology and set-up
What is the difference between a standard and a premium impact screen?
Standard: single-layer, sags, hardly any sound damping. Premium: multi-layer, keeps its shape, noticeable sound damping, often B1-certified – for details see the screen class table in the impact screen section.
Do I need soundproofing for indoor golf?
In blocks of flats, terraced houses and clubhouses with neighbouring rooms: yes – a foam underlay mat and possibly foam balls are usually the first measures. Whether they are sufficient depends on the room, floor construction and neighbourhood situation. Details in the acoustics section.
Is a 4K projector worthwhile even with a smaller image area?
In an indoor golf set-up, yes – the player stands at swing distance in front of the screen, where the pixel structure becomes visible sooner than in a classic home cinema. 4K delivers more realistic green rendering and a sharper impact replay; from 3.6 m image width it is a clear recommendation.
How long does it take to assemble a golf simulator box?
With tool-free premium boxes such as the FAIRWAY line, about 60 minutes for two people. DIY kits with tubes you cut yourself take many times longer.
Can the box be dismantled if I move house?
With tool-free systems, yes. The FAIRWAY box can be completely dismantled and reassembled at the new location – making seasonal operation, mobile showrooms and club pop-ups feasible. Many screwed systems are less convenient for regular assembly and dismantling.
Can I do the set-up myself, or do I need an installer?
Doing it yourself is no problem with tool-free boxes. For the complete set-up (box + ceiling-mounting the projector + calibrating the launch monitor + software set-up), allow 4–6 hours with two people. For commercial facilities, professional advice is worthwhile, at least for choosing the projector and for room acoustics.
Can I replace the box with a larger one later?
Technically yes – the box can be dismantled and sold or put into storage. Economically, it makes more sense to choose the next size up when you first buy, if the room allows it. The extra cost within the FAIRWAY line is much smaller than buying twice later on.
Frequently asked questions: costs and operation
What does a complete indoor golf set-up for home cost?
As a rough guide: a simple private set-up with a basic FAIRWAY box, a short-throw laser projector with 3,500–4,000 lumens, a floor-standing launch monitor (entry level) and a software licence starts at around €4,500–6,000. If you opt for 4K resolution, a camera-based launch monitor and a larger box, you will end up at €8,000–15,000. Premium set-ups with a ceiling camera and a dedicated simulation projector cost more. The actual costs depend heavily on the launch monitor, projector, software licence, installation and room preparation – we will be happy to put together specific recommendations for your room and budget.
Which insurance aspects are relevant for an indoor golf facility?
For commercial indoor golf facilities, insurance and operator obligations should be clarified individually with an insurer or specialist adviser. From a hardware point of view, relevant evidence includes B1 fire protection for the impact screen (included as standard in the FAIRWAY line), a safe enclosure, stable mounting and documented material properties.
Conclusion and recommendation
Choosing the golf simulator box is the longest-term decision in the entire set-up – everything else can be swapped later, but the box stays in place for years. Three points make the difference between a set-up that is fit for everyday use and a compromise:
- Premium-class impact screen: multi-layer construction, gain around 0.9, B1 fire rating. Protects not only the playing experience but also your expensive hardware from rebounding balls. If you play regularly, a high-quality impact screen usually pays for itself sooner than a pure price comparison would suggest.
- Sturdy tubular frame with foam padding: protects the frame from material fatigue and cushions mishits.
- Tool-free assembly: saves hours during the initial set-up and is a prerequisite for mobile or seasonal operation.
The celexon FAIRWAY Professional line meets all three criteria – six versions from 2.6 × 2.5 × 1.5 m for a compact private practice room to 4.0 × 3.0 × 3.0 m for commercial indoor golf facilities with a ceiling camera set-up.
Personal advice – tailored to your application
For your home: send us your room dimensions (depth, width, ceiling height), player type (right-handed / left-handed / both), desired image width and budget range – we will recommend the right box version, projector class and launch monitor design. Advice for private customers is usually given by phone in a conversation of approx. 20 minutes.
For indoor golf facilities: we support you with the technical design: box versions per bay, choice of projector and launch monitor, ceiling and mount set-up, acoustic and lighting concept, fire protection hardware. Facility concepts typically start with a video conference appointment and a review of your floor plan.
Contact us + request personal advice →
Matching product categories in our shop:
Further guides:
- Lens shift on projectors – detailed guide with model examples
- Projector throw ratio explained – throw ratio and the three classes
- Screen fabric types – fabric types from Virtual Black to acoustic
