
Video calibration

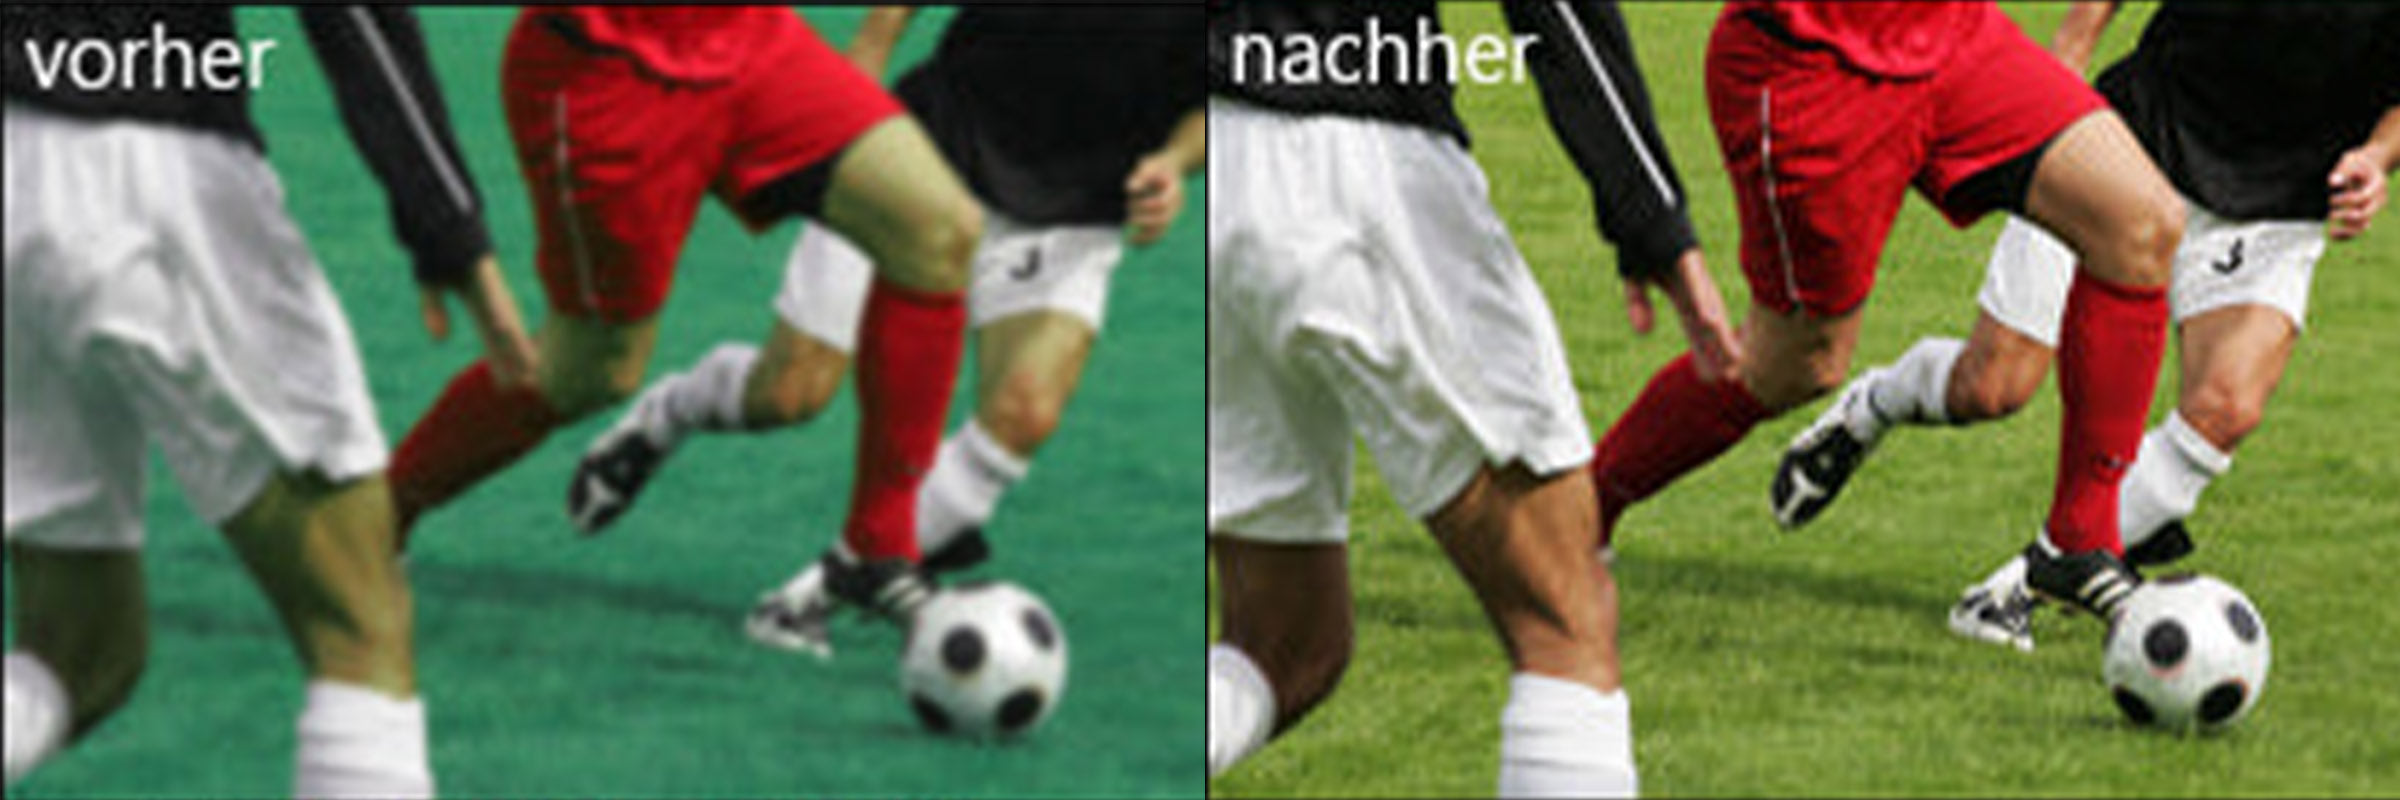
You have just spent your hard-earned money on a new home cinema projector. But why is the grass blue? Don't panic, there is a simple solution. Projectors, like TVs and monitors, sometimes just need a little fine-tuning to show them at their best. Every source (DVD player, HDTV box or Blu-ray player) that you connect to your projector sends a different signal. All your video settings will be affected, so a simple calibration of the projector or TV should quickly fix the problem.
In the past, an expert would carry out the calibration in your home. For this service you would pay anywhere between €75 and €380. But now, if you have the motivation, you can buy software to carry out the calibration yourself. Then again, if you want to save the money, you can also do it by eye with a DVD player. The following sections explain how.
Preparing for calibration
The five video elements
- Brightness (black levels)
- Contrast or picture (white levels)
- Colour (colour saturation)
- Tint (hues)
- Sharpness (detail accuracy)
Let's get started!
Ideally, you should use a dark room for calibration – or, if you watch a lot in daylight, a lit room. It is also a good idea to give your projector 15–20 minutes to warm up properly.
A note on the test scene
If you adjust your picture without software, you adjust it to look natural. Your test scene should therefore show natural images that you can compare with your own experience of real life, such as green grass. To adjust contrast and brightness, a high-contrast scene is helpful. A high-contrast scene means one that has a pure black and a clean white. The black and white images should have a high level of detail. Although it may seem like an ideal idea, black-and-white films are not helpful for this process. Our choice was an Italian film called "Life Is Beautiful". At the end of chapter 14, Roberto Benigni appears dressed in a tuxedo in a pristine white restaurant.

The picture settings step by step
Brightness setting
In short, your brightness level is actually the black level. To set it, you need a high-contrast scene. Make sure that the black in your scene really is black and not dark blue.
Start by setting the brightness to the maximum level. You will immediately notice that the picture looks washed out, as if someone had laid a white transparency over it. Then bring the level back down. Watch the black until it roughly matches the projector's level. Now look into the black areas, paying particular attention to details and shadows (such as the texture of the tuxedo). Take care not to lower the black level so far that details are lost in the darkness.
Once you have hit the perfect black level, turn your attention to the brighter areas. The bright areas should be lit, not grey, and should reveal details.
Setting the contrast or picture
Contrast is also called the white level. Just as with brightness, you can raise the contrast to its maximum. You will notice strong brightness, sometimes even "glowing" spots, in bright areas. Details are overemphasised. In our example, Roberto's white shirt has no shadows at this high setting. Now start reducing the contrast until you can see the details in the white areas again.
After you have set the contrast , go back to the brightness and check whether the black is still black. Sometimes one setting can affect others. You may have to switch back and forth between the brightness and contrast settings more than once to perfect the picture.
Colour setting
 This is one of the most noticeable problems when the picture is not set correctly. As usual, turn the colour all the way up and then straight down so that you can see the change. When the colour is set to 0, the whole picture turns black and white. When you set the colour to maximum, the whole picture turns red.
For this calibration, use a scene with skin tones. The scene we used from "Life Is Beautiful" shows a close-up of two people with green plants behind them. Concentrate on the faces and pay particular attention to any shift towards red or towards washed-out colours. Repeat this as often as necessary until you have found a natural-looking skin colour. Also keep an eye on other colours, for example the plants in the background – all elements in the picture should look true to life.
Setting the tint
This setting can be carried out with the same scene. As with the colour setting, maximise the setting and minimise it again to get a feel for it. You will notice that the hue changes from green to red and on to the most extreme hue.
As before, the aim is to make the picture as true to life as possible. Normally, you want a hue between the red and the green tint. Experiment until you get the best picture. We used a scene showing more than one face to make the difference clearer.
Some projectors split colour and tint into their RGB components. If you are lucky enough to have such an option, follow the same steps as described above.

Setting the sharpness
As always, you first need to get a feel for the sharpness. While changing the settings, pay particular attention to the edges. When you maximise the sharpness, you will see distortion at the edges of your picture. Then bring the sharpness back to the point where these hard edges disappear and soft but still well-defined edges remain.
It is a little difficult to set the sharpness with your own DVD player. However, with calibration software it is no longer a problem for LCD or DLP projectors.
After calibration
All done?
Once you have completed the process, you should be able to see a change in your picture. That was a quick and easy guide to video calibration. Some projectors have a setting for changing the colour temperature. These are quick and easy adjustments and a good start towards better, more lifelike pictures.
If you want the lawn to be blue and the edges distorted and over-sharp, that is up to you. But if you really want to see what the film's creator intended to show, you should seriously consider buying calibration software.
Video calibration software
What these discs contain are perfect examples of contrast, colour and detailed images. These examples, including colour bars and other useful visuals, make it much easier and more accurate than you could manage on your own with your DVD player. As a bonus, there are also tips on how to achieve the best sound, the best lighting and the best design for your home cinema.
Matching product categories in the shop:
Further guides:
- Projector buying guide using the BEAM method – overview of all guides
- Projector brightness – rule of thumb: ANSI lumens per square metre
- Projector contrast ratio – what contrast figures really mean
